Overview
PortaBilling offers a variety of notifications to send to your customers, resellers, and admins via email or SMS. Each notification is triggered by a specific event within the system. For instance, once an invoice status changes to “overdue,” the corresponding notification message is sent to the customer’s email and (optionally if SMS notifications are enabled) phone number.
A text for a specific notification is produced based on a template. These templates are grouped within a notification set and assigned to customers/resellers via a customer class or directly to individual admins (PortaBilling users). A notification template contains:
- Normal text, such as “Your invoice is overdue”, which is shown to the recipient “as-is”.
- Placeholders for variables, where the actual value, relevant for this particular notification, will be inserted (e.g., “Dear <% $customer_name %>” will be converted to “Dear John” when the notification is sent to John Doe).
Notification set
A notification set includes templates for all available notifications that can be sent via email or SMS. For convenience, these templates are grouped into categories like “Billing notifications,” or “Password recovery” within the notification set.
Notification templates
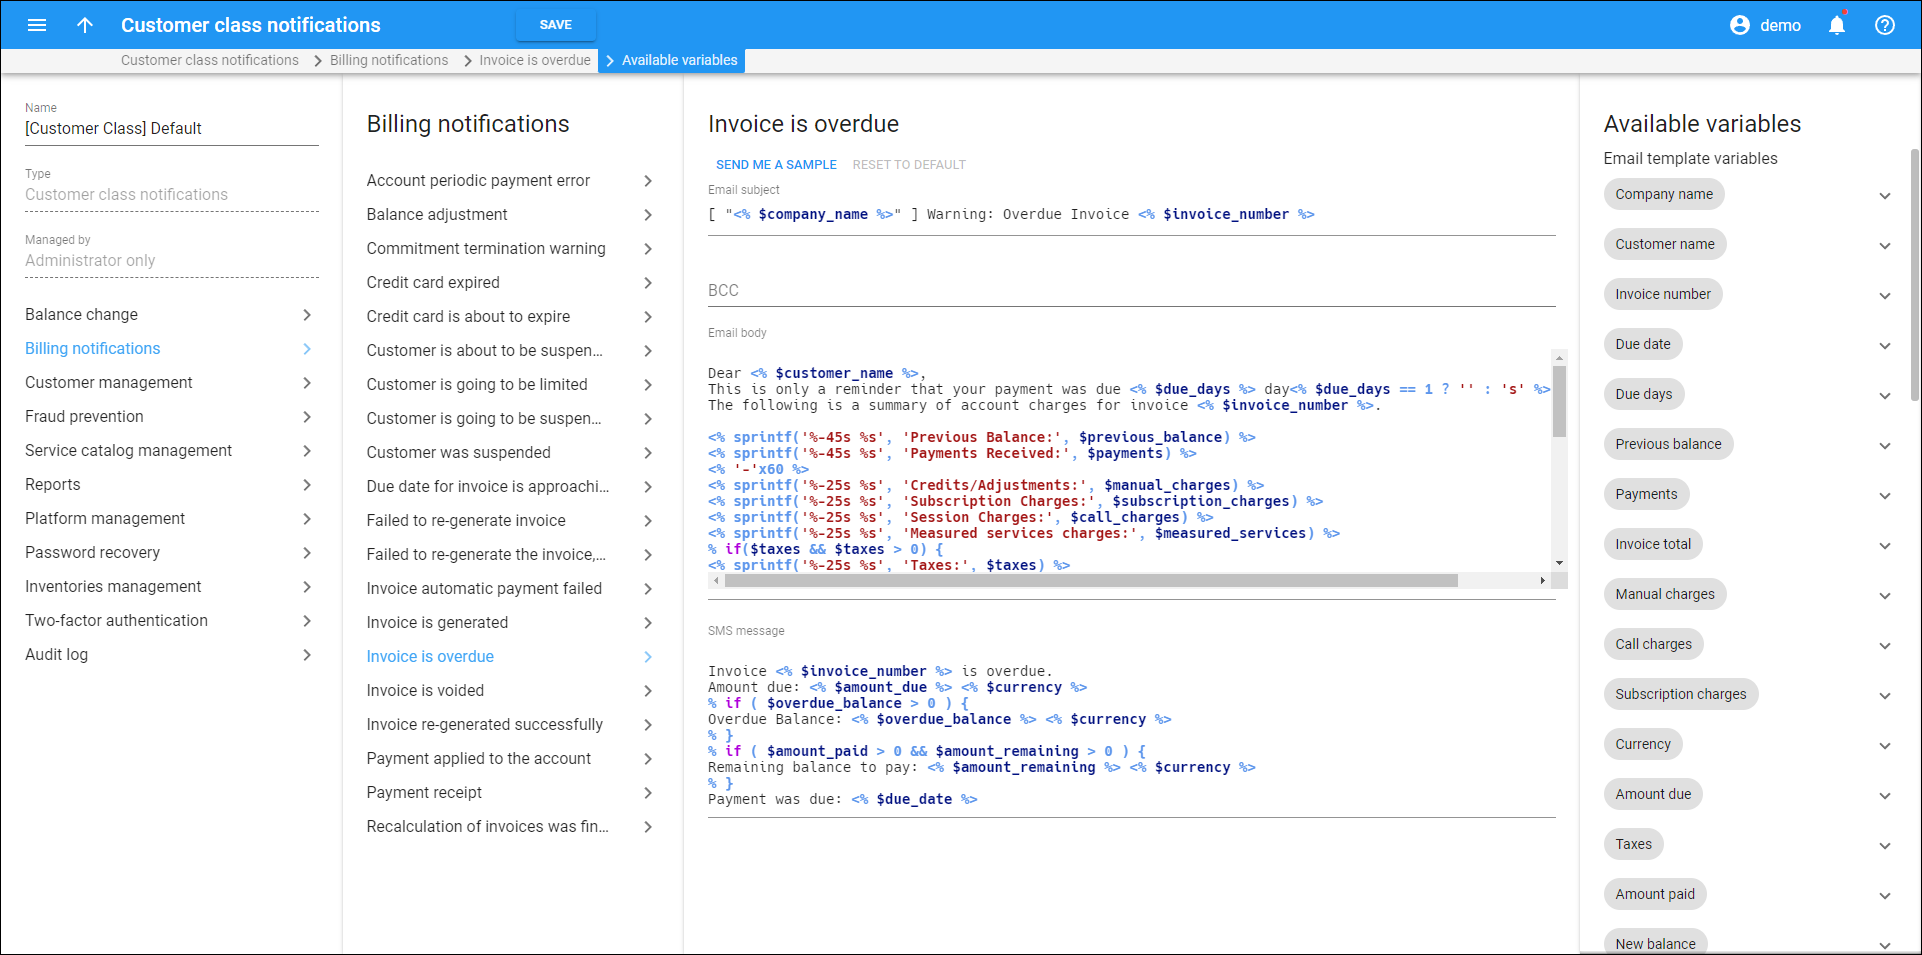
You can easily customize each notification template, including the email subject, email body, and SMS text, directly through PortaBilling’s interface to align with your company’s branding, communication style, and specific business requirements.
You have the option to compose notifications in the desired language (so French-speaking customers are assigned a notification set with all templates in French) and include specific details, such as a company signature at the end of the email body.
Notification templates contain variables, such as “Company name,” “Invoice number,” or “Amount due,” which are automatically populated with PortaBilling data when the notification is sent to a recipient. When composing a notification message, you can conveniently drag and drop these variables from the available options on the right-side panel. Notification templates are composed using the HTML::Mason syntax.
To preview the appearance of a notification, simply click “Send me a sample” to receive the test notification via email (specified in the Email field on your user page) and to your phone number (specified in the Alt. phone field on your user page).
Distinct notification sets for customers/resellers and admins
Since admins and customers require different notifications tailored to their specific tasks and concerns (e.g., customers don’t need to be notified about system errors, while admins are not interested in payment reminders), PortaBilling offers two distinct types of notification sets:
- Customer class notifications – these define the notifications to be sent to customers, e.g., about an overdue invoice, or their individual users (accounts), e.g., when a quota is exhausted by a specific account. Also (since resellers are your customers) you will use this type of notification set to define the notifications to be sent to your resellers. You can attach such a notification set to a customer class, which is then assigned to a specific customer (or reseller).
- User notifications – the notification set of this type includes the notifications that are relevant for admins, i.e., people who log in to PortaBilling web UI. Such a template is assigned directly to a PortaBilling user.
Notifications configuration
The notifications setup involves the following steps:
- Creating a notification set of the needed type (“Customer class notifications” or “User notifications”). In the template, you can edit the email subject, email body, and the text of SMS for each available notification.
- Enabling the notifications:
- Assigning the notification set to a specific customer class / PortaBilling user.
- Within the assigned notification set, selecting notification categories or specific notifications that should be sent via email/SMS.
For customers, their individual users (accounts), resellers, or admins to receive notifications, make sure that email addresses (“Email” field) and/or phone numbers (“Alt. phone” field) are specified on their respective pages.
Creating a notification set
To create a notification set:
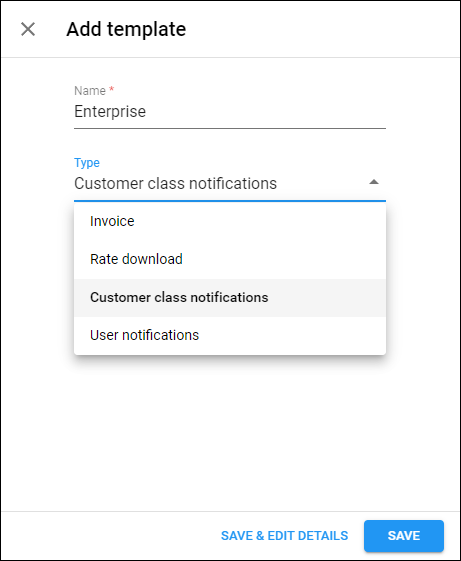
- Navigate to My Company > Templates.
- Fill in the following details:
- Name – set a descriptive name for the new notification set.
- Type – choose “Customer class notifications” or “User notifications” depending on whether you intend to configure sending notifications to customers or admins.
- Managed by – select “Administrator only” or assign the template to a specific reseller.
Enabling customer class notifications
Notifications for customers are enabled at the customer class level.
To enable the notifications for a specific customer class, follow these steps:
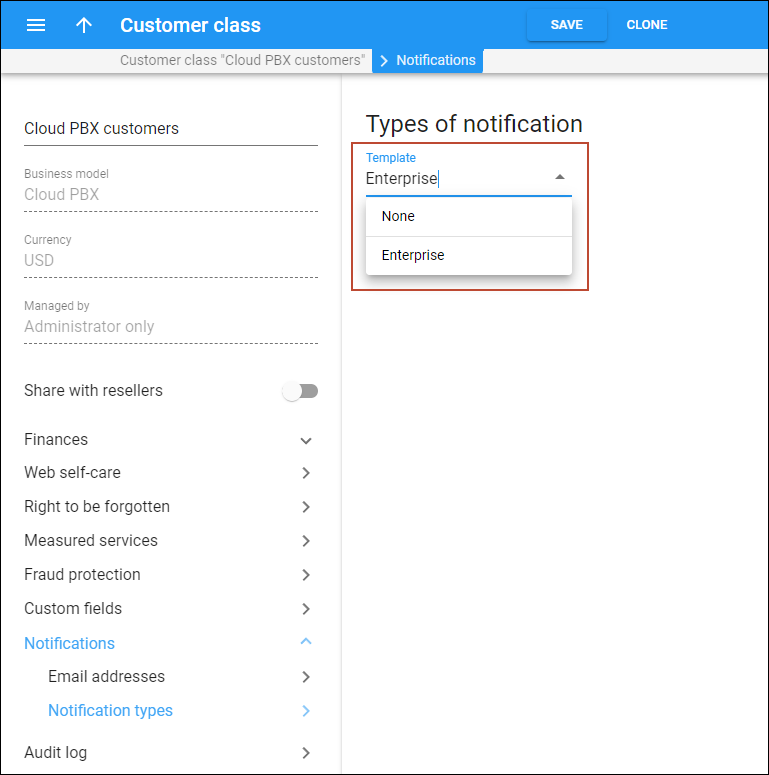
- Open the Customer Class > Notifications > Notification types > select a notification set from the dropdown list.
- Select checkboxes for categories or specific notifications that should be sent to the customers via email/SMS. To unfold a category, click next to its name.
Refer to the How to manage customer class notifications handbook for more detailed instructions.
Notification configuration for admins (user notifications)
Notification sets can be assigned to a user, and specific notifications within the set can be enabled or disabled for the user.
How to assign a notification set
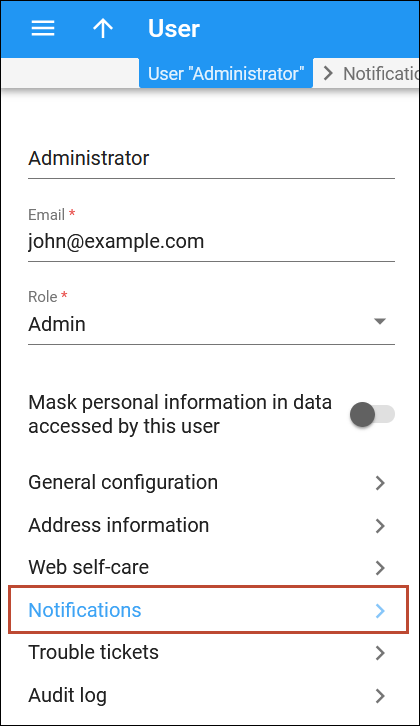
- Navigate to My company > Access control > Users > open a specific user and go to Notifications.
- Select a notification set from the dropdown list to assign it to the user.
- Click Save.
How to customize a notification set
After selecting a notification set, choose which categories or specific notification types to send via email or SMS by selecting/clearing the checkboxes. To expand a category, click the Arrow down ![]() next to its name.
next to its name.
How to edit an individual notification template
Click on the name of a notification category, e.g., “Customer management,” to view and edit the corresponding notification templates within the notification set.
Notification messages syntax
In the message text, variables such as “Company name,” “Invoice number,” or “Amount due,” are enclosed in tags <% %>. You can use Perl expressions within these tags. For example, the line below includes a conditional statement, which will display either the company name (if one is defined) or the customer name:
<% $companyname ? $companyname : $name %>
You can also use the following functions for editing notification messages:
- column (text, width => N, align => ‘left’|’right’) – this function generates a padding space string of specified width, with the option to align the text either to the left or right. By default, the text is left-aligned. The parameters for this function include:
- text – the text to output
- N – the width of the padding space string
- align – defines the text alignment (can be either left- or right-aligned)
- line (char, width) – this outputs a string of repeated characters (e.g., dashes to underline the text). The function’s parameters are:
- char – the character to repeat
- width – the number of times to repeat the character
For example, the following code:
<% column('Previous Balance:', width => 45) %> <% column($previous_balance, width => 10, align => 'right') %> <% line('-', 25) %>
will output the following string:
Explanation:
- “Previous Balance:” is left-aligned within a 45-character wide space.
- The value of $previous_balance (“10.00”) is right-aligned within a 10-character wide space.
- A line of 25 dashes is generated below the text.


