Step 1. Enable the Shared line appearance feature
Link copied to clipboard
Enable the Shared line appearance feature for the account (directly or at the product level).
On the product level
Link copied to clipboard
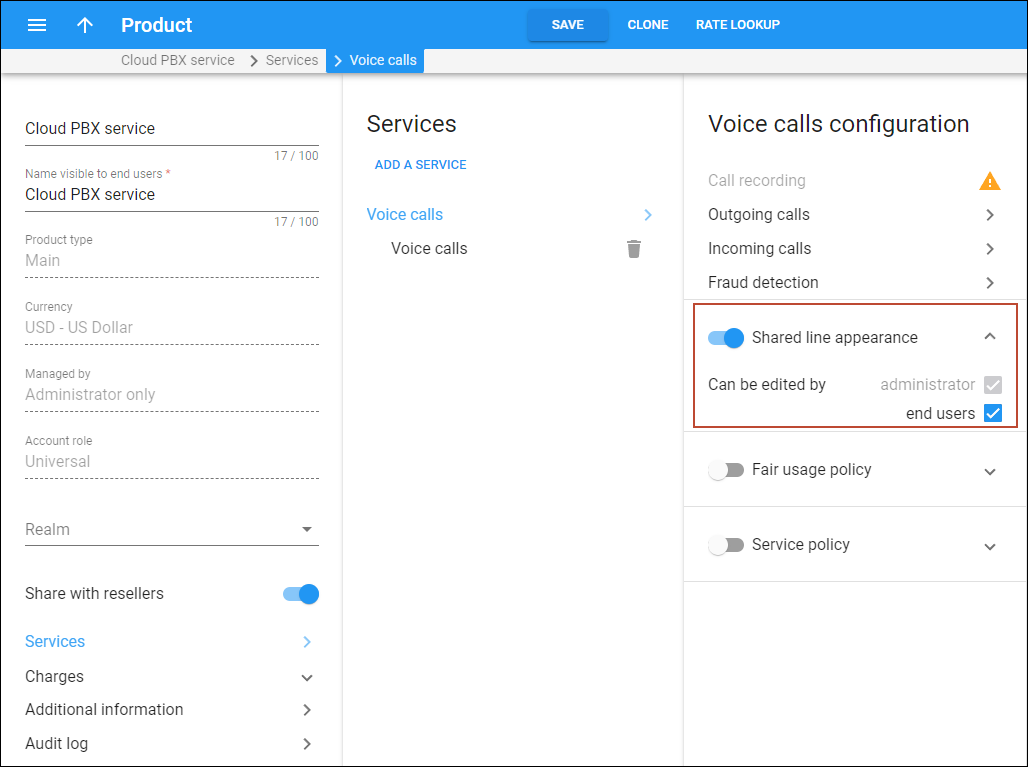
This will make shared line appearance available for all accounts that use a specific product. To enable the feature at the product level:
- Open Product > Services > Voice calls
- Turn on the Shared line appearance toggle
Optionally, to allow your customers to enable/disable shared line appearance for accounts with this product via their self-care interface, select End user in the Can be edited by field.
Directly on the account
Link copied to clipboard
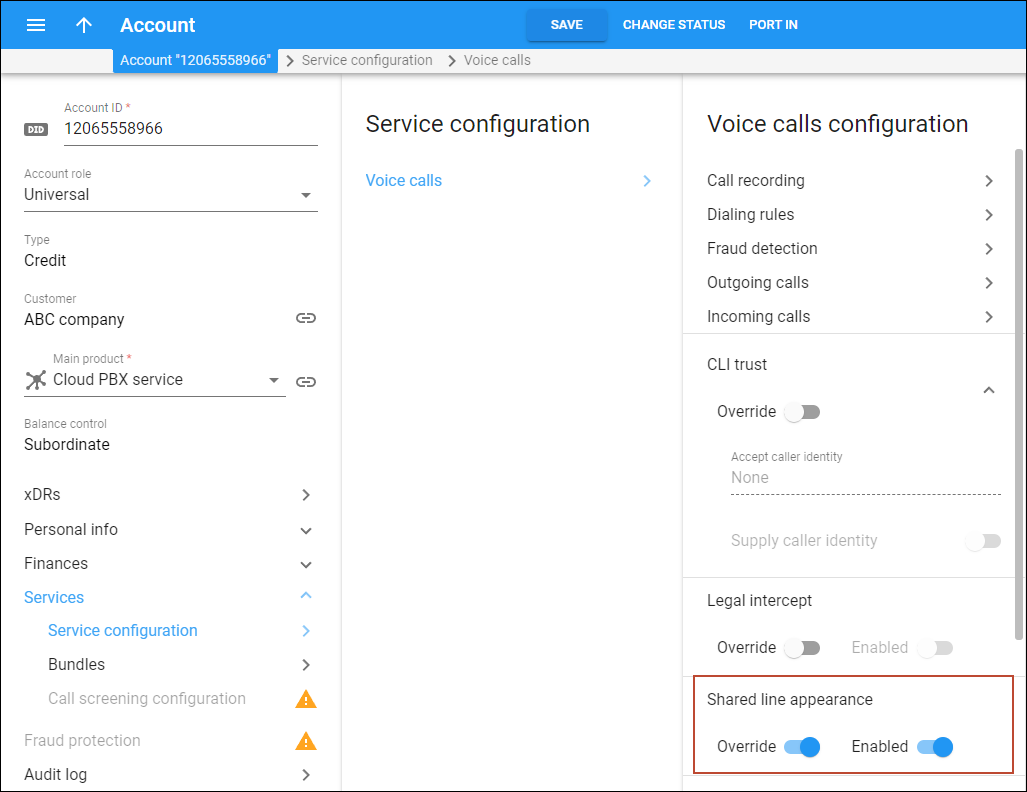
You can enable shared line appearance for a specific account that will be used as a shared line. To enable the feature at the account level:
- Open Account > Services > Service configuration > Voice calls
- Turn on the Override toggle (this is needed if shared line appearance is disabled for the account’s product) and turn on the Shared line appearance toggle
Step 2. Make sure that SIP registration is enabled
Link copied to clipboard
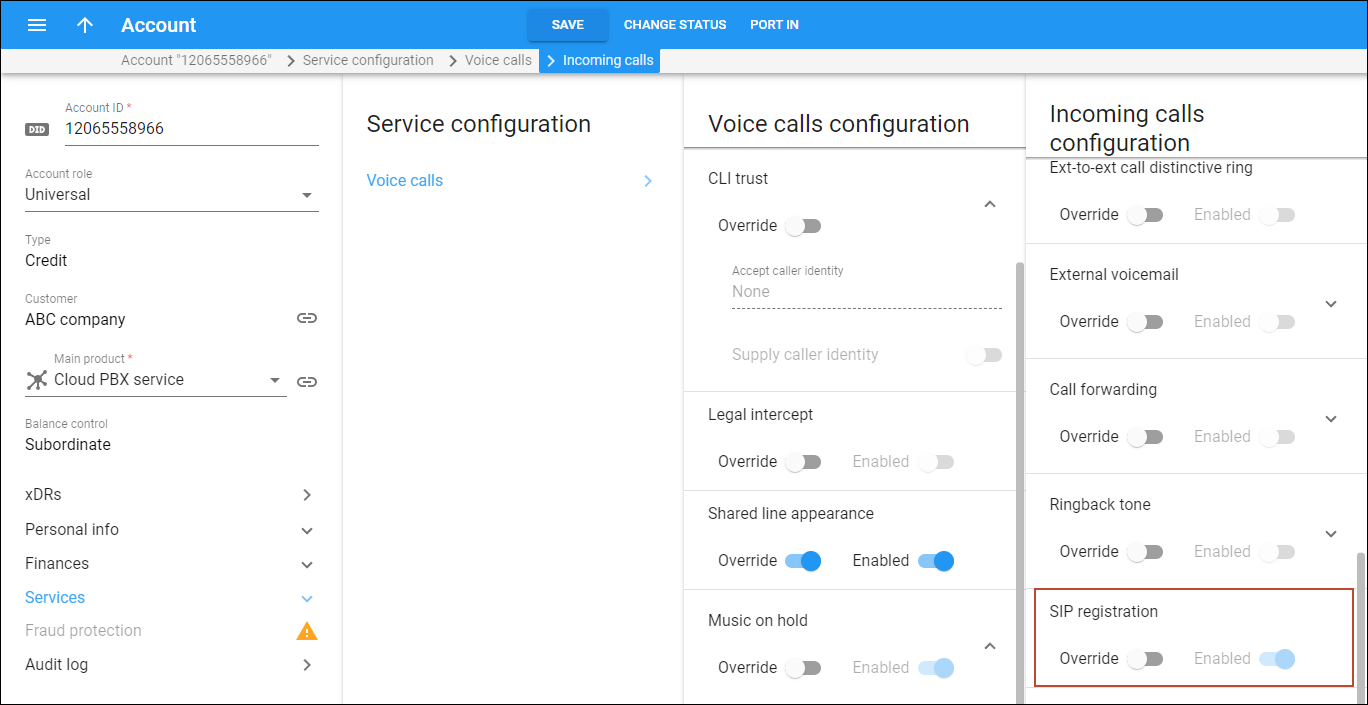
Make sure that SIP registration is enabled for the account that will be used as a shared line:
- Go to Account > Services > Service configuration > Voice calls > Incoming calls
- Make sure that the SIP registration toggle is turned on (this is the default setting)


