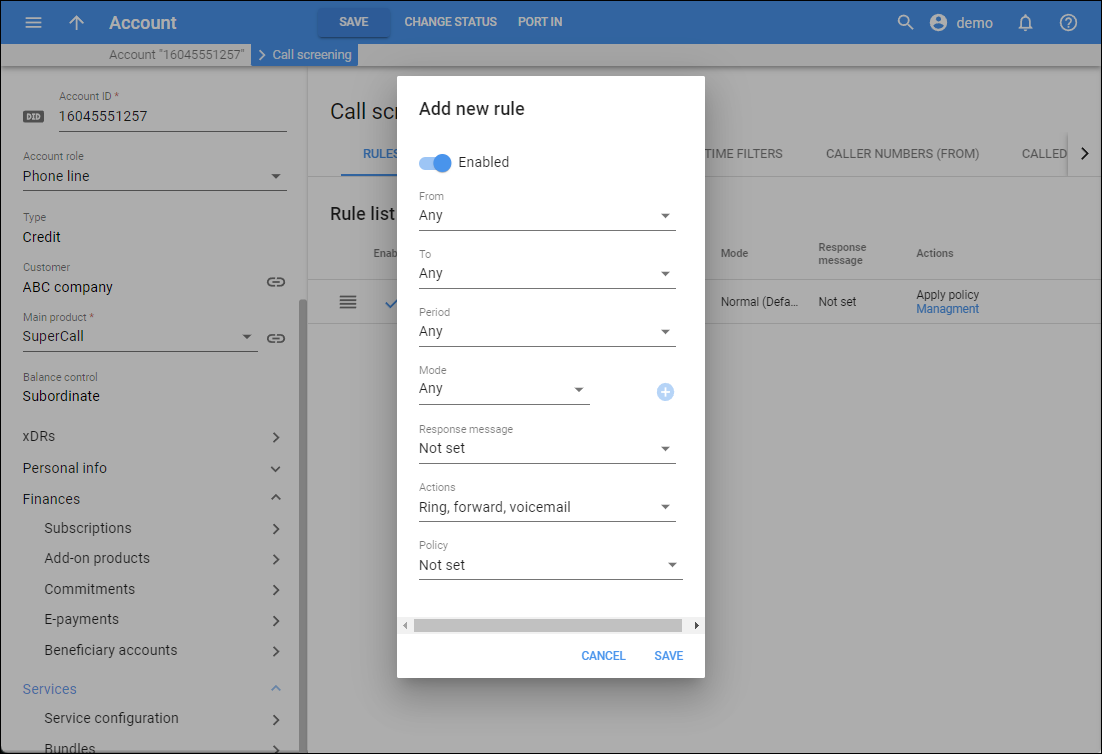
On this tab, you can manage call screening rules for the account. A rule is a combination of conditions (e.g., time of the call, caller/called number), and specific actions that define how to process an incoming call if it matches these conditions.

How to add a new rule
To add a rule, click Add rule and specify the details in the dialog that opens:
- Enabled – by default, the rule is enabled once created. Turn off the toggle if you want that rule to be disabled.
- From – you can select the caller filter by name (previously created for the account on the Caller numbers (From) tab).
- To – you can select the called number filter by name (previously created for the account on the Called numbers (To) tab).
- Period – select the time period (previously created on the Time filter tab with the defined time conditions).
- Mode – select one or more modes for this rule. To select another mode, click Add
 . The modes should be previously created at the customer level.
 - Response message – select the response message that will be played to the caller (previously uploaded on the Response messages tab).
- Actions – select actions that will be performed if a call matches the conditions specified above (the actions will be performed after playing the response message if it is set).
- Policy – you can select a call screening policy created at the customer level. A policy may also include several rules in the defined order. The rules from the selected policy will be tried after the created rule.
Once the first rule that matches the call is applied, the other rules (the rules from the selected policy or those that are next in the account’s rule list) are ignored. See how to change the rule order for the account here.

To edit a rule, hover over a specific rule and click Edit . Change the details in the dialog that opens.
Rule list
You can see the following info for the account’s rules:
Enabled
This shows the status of the rule. Check mark ![]() means that a specific rule is enabled.
means that a specific rule is enabled.
From
This shows the name of the calling party.
To
This shows the name of the called party.
Period
This is the time period when the rule is applied.
Mode
This is the mode this rule is assigned to.
Response message
This shows the name of the response message that is played to the caller.
Actions
This shows actions that are performed if the call matches the conditions specified in the rule. Also, if a call screening policy was selected for the rule, the policy name is also shown here. You can click the name of the policy to go to the corresponding policy page.
How to change the rule order
The order of rules matters. PortaBilling checks the rules from top to bottom by caller/called numbers, time interval, the current mode of the account (if some account’s rule includes a call screening policy, PortaBilling first checks the rule, then the rules included in the policy in the defined order, and then checks the next account’s rule).
Once the first rule that matches the call is applied, the other rules are ignored.
To reorder rules for the account, select a specific rule using Reorder and drag it up or down.


