The Account Info page is provided for Customer Care staff which are responsible for answering requests from Account holders and carrying out refunds. Some account details are read-only. The interface requires that the Account holder provide the operator the Account ID.
Click the Show Accounts button to see the Account Information for that Account.
When making any changes, the Help Desk staff should also provide a comment in the Notepad, detailing the reason for the changes (for example, “user unable to call due to network outage, credited $5”). Changes can be confirmed by selecting Save, or Save&Close.
To deactivate an active debit account, press the Terminate button in the toolbar.
Account Info
|
Field |
Description |
|---|---|
|
Customer |
The Customer this account belongs to. |
|
Type |
The Account type may be one of “Debit”, “Credit”, or “Voucher”. Debit is usually associated with pre-paid cards. Credit is a type of account that will be invoiced for incurred costs. Voucher accounts are “refill coupons” for debit accounts. |
|
Service Password |
The password used to authenticate any calls made using this account. |
|
|
The email that is associated with the account. |
|
Opening Balance |
The opening balance for this account. |
|
User Agent |
Displays the user agent identification info when this account is currently used by this SIP UA to register with the SIP server. |
|
Contact |
The URI of the user agent used by the SIP Proxy to contact the IP phone. |
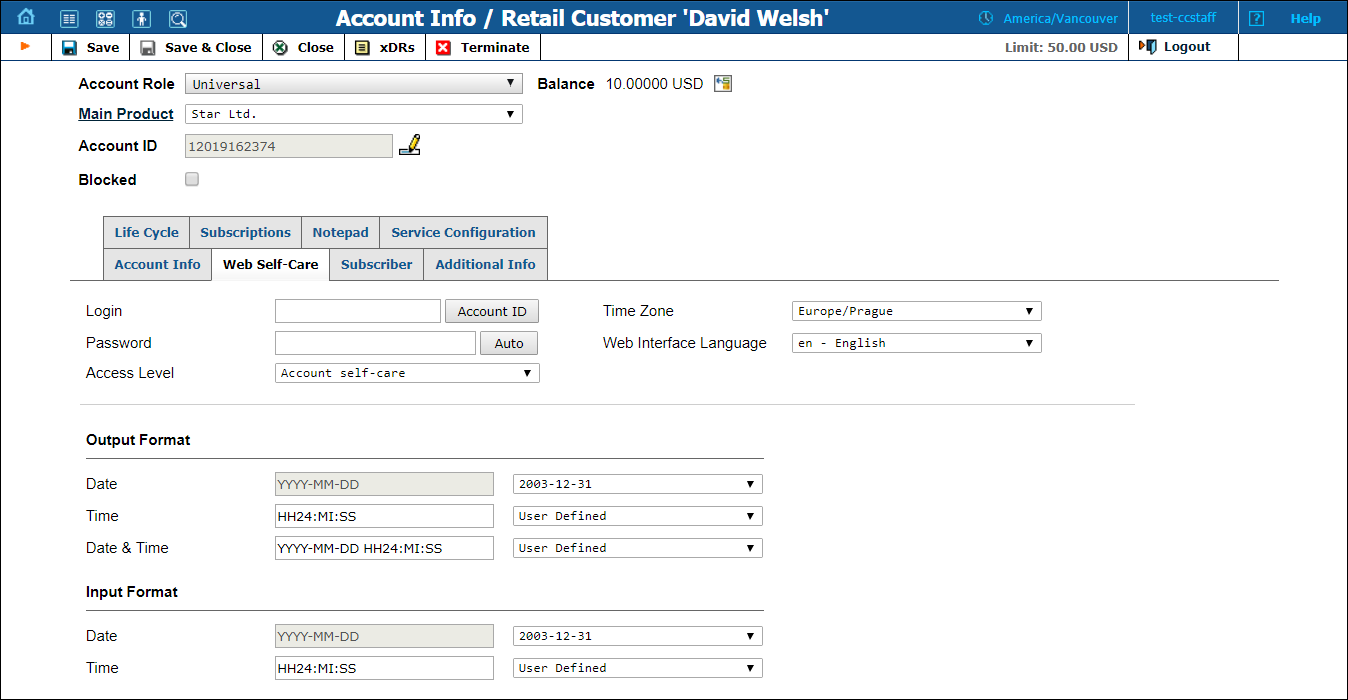
Web self-care
|
Field |
Description |
|---|---|
|
Login |
Account login for the account user interface. Click the Account ID button to make the login identical to the Account ID. |
|
Password |
User interface password for the account. |
|
Access Level |
Access level assigned to the account. |
|
Time Zone |
Time zone for the account. |
|
Web Interface Language |
Displays the account user interface in a particular language. |
|
Output Format/Input Format |
PortaBilling allows users to define both input and output formats for date and time. See the Date & Time format section. |
Subscriber
The Subscriber tab provides most of the commonly required contact information for the account’s owner.
Additional Info
|
Field |
Description |
|---|---|
|
E-commerce Enabled |
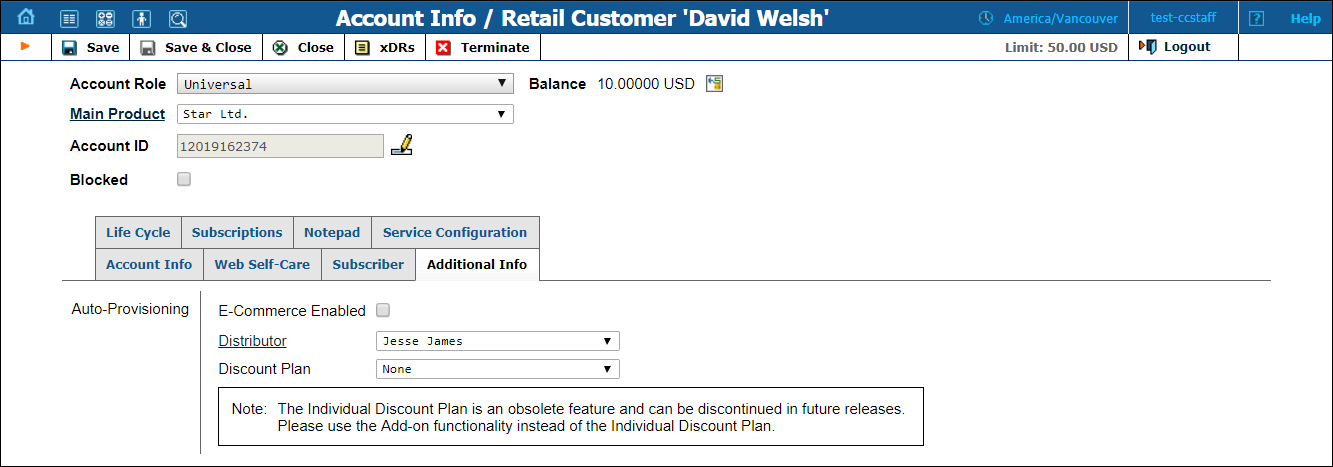
Allows the account’s owner to make online payments or set up periodic payments on the account self-care page. Configuring the account to enable online payments (both manual and periodic) is done in exactly the same way as for customers. First, you should set up a suitable payment system.
|
|
Distributor |
Here you can assign the existing distributor to the account. |
|
Discount Plan |
Assign a discount plan to this account. When a new account is created, it will be assigned by default a discount plan associated with the account’s product. |
Life cycle
|
Field |
Description |
|---|---|
|
Activation Date |
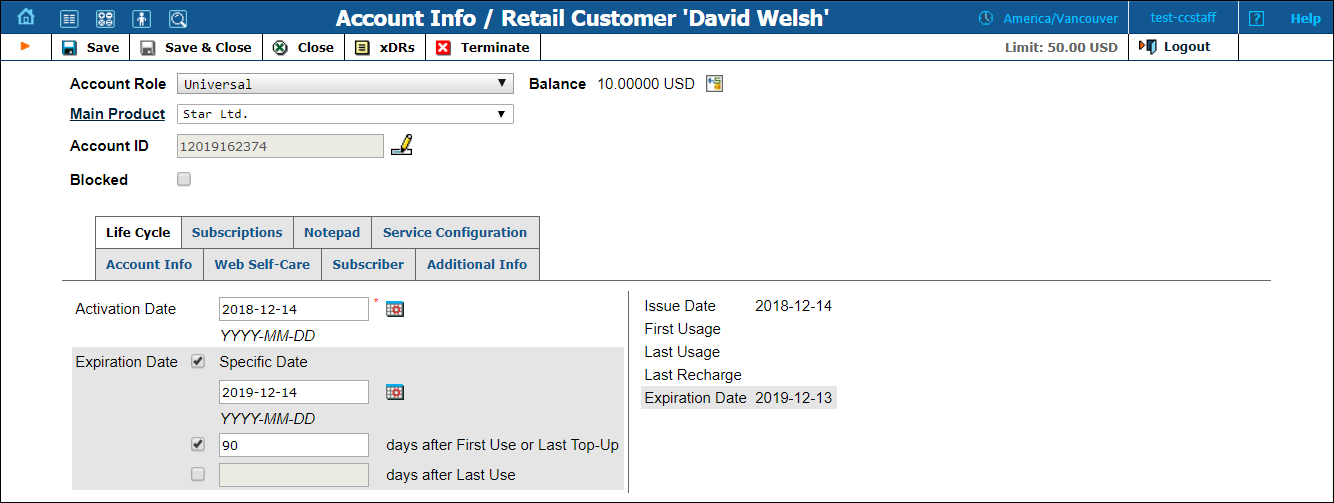
The date from which the account is usable. |
|
Expiration Date |
The date from which the account will be unusable. If you do not want the account to expire, leave this field blank. This date is assumed to be in the billing server’s time zone, not the account’s one.
|
|
Specific Date |
This identifies the date that the account expires. |
|
…days after First Use |
This defines the number of days the account remains active after its first use or recharge. |
|
…days after Last Use |
This defines the number of days the account remains active after its last use or recharge. |
|
Issue Date |
The date when the account was created. |
|
First Usage, Last Usage |
The date when the account was in use for the very first/last time. |
|
Last Recharge |
Specifies the last time the account was recharged using a voucher (either via the self-care page or IVR). |
Subscriptions
The information about the Subscriptions you can find in the Edit Customers section.
Service configuration
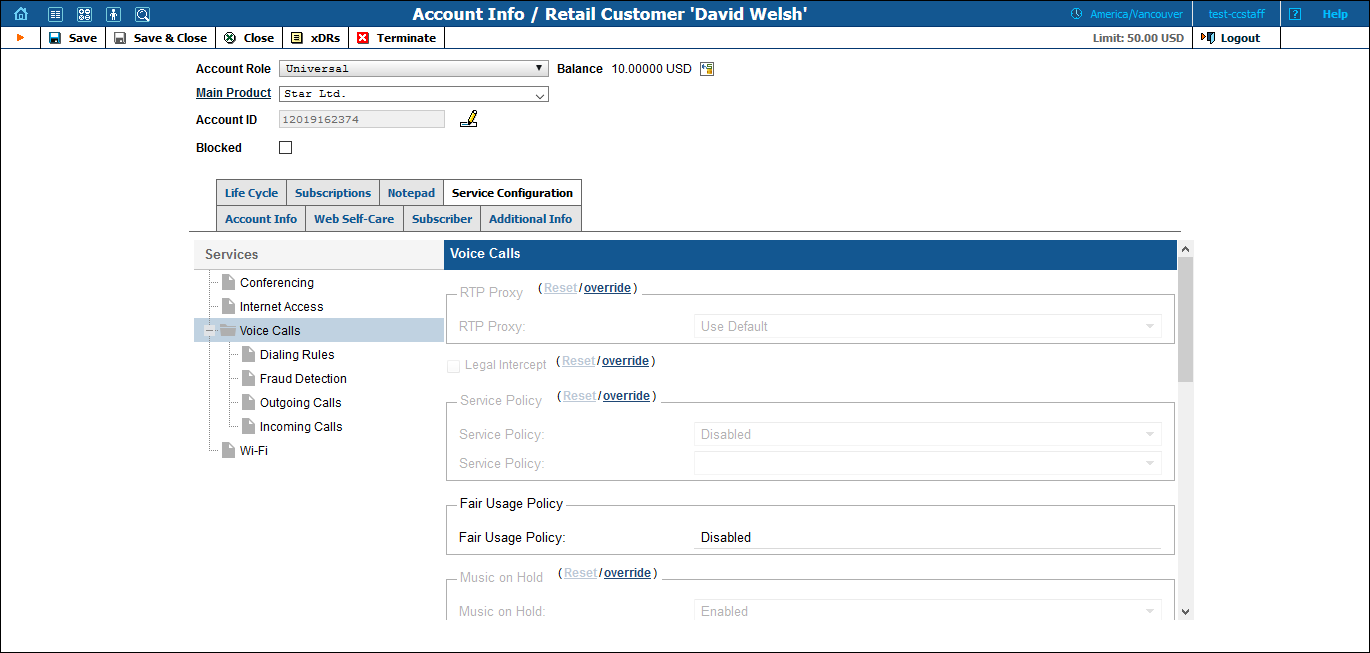
You have the option of expressly specifying the value of a given parameter or using the “Customer default” option. In the latter case, this parameter is assumed to be the value defined in the customer’s configuration (the global value for this cloud PBX).
|
Field |
Description |
|---|---|
|
The Voice Calls service type |
|
|
RTP Proxy |
This specifies the RTP proxy policy for this account.
|
|
Legal Intercept |
Intercept all incoming and outgoing calls of this specific account for law enforcement purposes. |
|
Service Policy |
This specifies a predefined set of options for this account. |
|
Fair Usage Policy |
This shows the Fair Usage Policy settings as applied to the account via Product. The field works in read-only mode. |
|
Music On Hold |
Defines the music on hold to be used with the account. Choose None to disable this feature, or select the default setting for the account’s customer. To upload your own music, select a file on your local file system using the Browse button. To rename the music, enter the desired name in the Music Name field; otherwise the local file name will be used. The uploaded music will replace the previous entry in the list, and is usually enabled within 10 minutes. |
|
Call Recording |
Enables the recording of calls made or received by this specific account. The user can start and stop recording a specific phone conversation after it has already started by using various phone controls. |
|
CLI Trust |
Accept Caller Identity: This option indicates acceptance.
Supply Caller Identity: This option indicates acceptance.
|
|
Limit Simultaneous Calls |
This shows the Limit Simultaneous Calls settings as applied to the account either via Customer or Site. The information is available in read-only mode. To enable the Limit Simultaneous Calls feature, activate the send_start_acct option for the corresponding PortaSIP instances on the Configuration Server. To increase the features accuracy,
activate the allow_reauthoption too. Note that these features may slightly increase the load on the billing engine.
|
|
Associated Number |
Specifies the number to be sent back to the IVR in an authorization confirmation. For example, this might be a redirect to a technical support number in an IVR application. Another example might be a quick-dial number for prepaid accounts. (In this case, the redirect number may be maintained via web self-provisioning.) |
|
The Dialing Rules section |
|
|
Dialing Rules |
This permits you to enable/disable the dialing rules. |
|
Dialing Format |
|
|
Translate CLI on outgoing calls |
This permits you to translate the CLI number in outgoing calls based on the selected dialing format. |
|
Translate CLI on incoming calls |
This permits you to translate the CLI number in incoming calls based on the selected dialing format. |
|
The Fraud Detection section |
|
|
Location Information |
In this section you can set the country that the end user is currently in or usually resides in (and thus this country will be treated as ‘safe’ when the system checks for fraudulent activity) and whether the end user is allowed to make calls from abroad.
|
|
Allowed Mobility |
This option is available only when Location Information is set to Enabled. Specify whether the end user is permitted to make calls from abroad.
In this case, the call will be screened if it does not meet one of the following conditions:
|
|
Current Location |
This option is available only when Location Information is set to Enabled. Select the country from the list. |
|
The Outgoing Calls section |
|
|
Individual Routing Plan |
This feature permits selection of the routing plan to be used for outgoing calls when the end user dials a number. A specific selection code does not need to be dialed first.
|
|
Phone Book |
Activates the Phone Book feature. This allows an account user to maintain its own set of frequently dialed numbers, assign speed dial codes to them and define a list of favorite numbers. |
|
Hide CLI |
This allows end user to remove/show CLI (ANI) information for outgoing calls by dialing special feature access code before dialing the phone number. Note that when making a call, you can dial the special feature access code before dialing the phone number to override the default setting. |
|
Override Identity |
Override Identity – this allows you to set the following options for overriding identity information:
Identity – specify a default value that will replace the account identity (or display number) when the identity used for the call in the RPID/PAI headers (or From header) is invalid. If not specified, the account ID will be used instead. Override Display Number – this allows you to control the “Caller number” value that will be placed in the From: header and typically displayed on the called party’s phone display. The possible values are:
Display Number – specify a value that will override and replace the account’s original display number. If no value is specified, it defaults to the account’s Identity. Override Display Name – replace the original account number with the desired name. Display Name – this allows you to specify the desired name for the account. |
|
E911 |
Activate emergency services for this account. |
|
Call via IVR |
Allows outgoing calls to be processed in an assigned IVR-capable voice application. For example, the Pass-through IVR application plays a “time left” warning when there are a specific number of seconds left – before the call is disconnected – or it can announce the maximum allowed call duration to the destination and then connect the call. Note that the Pass-through IVR application is launched for all non-free calls to external numbers. The most common option is Product’s default. In rare cases, you may need to define special call processing for an account in order to override the product’s parameters. In such cases, select Enabled to activate the feature, or Disabled if you do not want to activate it for this account Voice Application – if a call via the IVR feature is enabled, select a voice application for processing the calls. Typically this is a special pass-through IVR application for voiceover announcements during the call, but any standard IVR application can be selected to intercept the outgoing call. |
|
Call Barring |
Activates the Call Barring feature (a new Call Barring tab will appear, where you can configure destinations which this user is not allowed to call). |
|
CPS Limitation |
This allows you to enforce the calls per second (CPS) limitation. The CPS limitation defines how many dialing attempts can be made by this account each second. Allowed rate – set the limit of dialing attempts per second for this account. If the limit is exceeded, new dialing attempts are rejected. The allowed values are from 1 to 1000. |
|
Preferred IVR Language |
This feature enables or disables the selection of languages from the “Language” list. |
|
The Incoming Calls section |
|
|
Unified Messaging |
Allows the account user to access the unified messaging system. Please note that if an account has Unified Messaging activated, there will be an additional link next to it on the web interface: Voicemail Inbox. By clicking on this you will go automatically to the account’s UM administration pages where you can quickly check the configuration of an account’s auto-attendant, call queues, and the like. Also note that it may take a few minutes before an account is fully provisioned in PortaSIP Thus if you click on the link immediately after activating Unified Messaging, it most likely will not work yet. |
|
Endpoint Redirection |
This allows the end user to configure call redirection on their SIP phones (if this feature is supported by the SIP phone) |
|
Caller ID (CNAM) Lookup |
This option shows the actual name of the caller retrieved from the database of the CNAM provider for incoming calls. |
|
Call Waiting |
Activates the Call Waiting functionality. |
|
Default Answering Mode |
Specifies the method of processing incoming calls to this account if selective call screening has been disabled, or if none of the selective call screening rules apply. |
|
Sip Contact |
Enable this feature if customer’s IP PBX can’t perform SIP registration to PortaSwitch. Deliver Incoming Calls To – Define whether the IP PBX address for delivering incoming calls is taken from the IP PBX registration account or specified directly in the Static Address field:
|
|
Auto Attendant |
Enables the auto attendant functionality for this account. Incoming calls will always go only to the auto attendant despite Unified Messaging functionality also being enabled. |
|
Ext-to-Ext Call Distinctive Ring |
For incoming calls from phones within the IP Centrex environment, use a ring pattern different from the default one. |
|
User Application |
Enable this option to allow the usage of custom IVR application. |
|
External Voicemail |
To ensure service continuity for mobile subscribers, you can redirect their calls to your host MNO’s voicemail. To do this, enable the External voicemail service feature and define the application’s access number. |
|
Present Caller Info |
Display caller info on incoming calls. |
|
Call Forwarding |
Assigns a call forwarding mode to this account:
|
|
Maximum Forwards |
When you select follow-me or advanced call forwarding, you must also provide a value for the Maximum Forwards parameter, so as to limit the number of concurrently active forwarding destinations allowed. Please note that you do not have to limit the total number of phone numbers entered, but rather the number of phone numbers active at any given moment of time. For instance, a user may have a list of 20 numbers, each active in its own time period, some temporarily turned off, and so on. When call forwarding is done, PortaBilling will compute a list of numbers which may be used at that moment, and choose only the first N in the list, where N is the number specified in Maximum Forwards. |
|
Forward by DTMF |
This option is active only when one of the several call forwarding modes is selected. It allows a user to use DTMF tones to transfer calls forwarded to the user’s mobile phone from the user’s IP Centrex extension, and to stay on the line until the other party picks up. Thus, if a user receives a call to his mobile phone and needs to transfer it to his colleague at Extension 1002, he dials *661002#, and when his colleague confirms that she is free to take the call, he hangs up. |
|
Call Screening |
Enables selective call processing/conditional call forwarding features |
|
Ringback Tone |
Enable this feature to choose which ringback tone to play to a caller:
|
|
The Internet Access service type |
|
|
Session Limit |
Allows you to define a specific number of concurrent sessions initiated by the account. |
|
Static IP |
Select Enabled if you want to assign a static IP to this account (the default setting is Disabled). Static IP – type in an IP. Static IP Netmask – type in a netmask, or leave the default value: 255.255.255.255 Routed Networks – type in the route for your IPv4 network in the CIDR notation format – X.X.X.X/Y Z.Z.Z.Z where: An example of Routed Networks can be this record: 203.0.113.0/24 203.0.113.1 Any incorrect adjustment of this parameter may affect the entire ISP network so please be sure that your settings are correct.
|
|
Access Policy |
The most common option is Product default. In rare cases, you may need to set a special policy for an account that will override the product’s parameters. In such cases:
|
|
The Conferencing service type |
|
|
Conferencing Enabled |
Allows the account user to use voice-conferencing services. |
|
Number of Simultaneous Participants |
Specify the maximum number of concurrent connections allowed for the conference. |
|
The Wi-Fi service type |
|
|
Limit Bandwidth |
The most common option is Product default. In rare cases, you may need to define special bandwidth values for an account that would override the product’s parameters. In such cases, select Yes to define these values, or No if you do not want to limit the bandwidth for this account. |
|
Max Download Rate |
Specify the maximum download rate for this account. |
|
Max Upload Rate |
Specify the maximum upload rate for this account. |
|
The IPTV service type |
|
|
Channel Package |
This feature defines a set of broadcast channels that are available to this account. |
|
Activation PIN |
Specifies a numeric code to be entered from end user’s STB (Set-Top Box) remote controller to activate IPTV services. |
|
The Messaging Service type |
|
|
SMS/MMS Routing Data |
The following options are available:
|
|
Update NetNumber database |
|
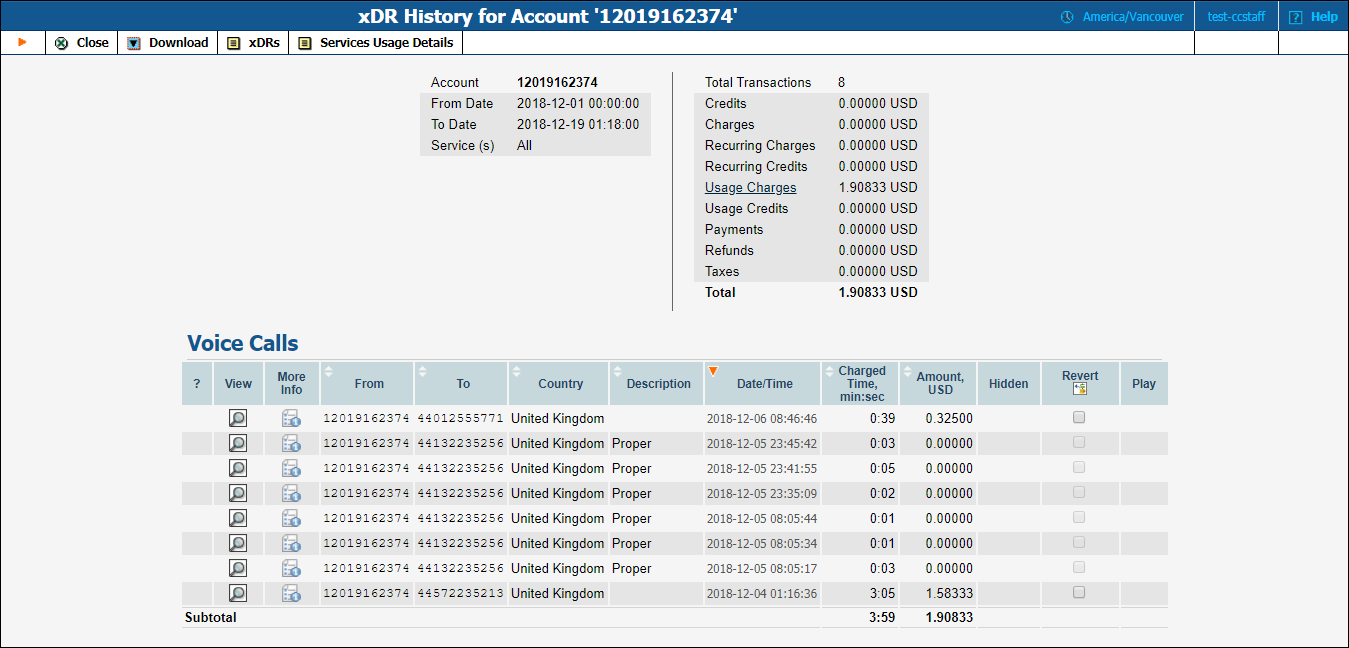
The Customer Care operator can also browse xDRs for the account by clicking the xDRs button on the Account Info screen.
On the xDR view page you can make an extensible search via:
- A date and time range by clicking the
 icon.
icon. - A certain service type.
- Required accounts type (for customers only).
To initiate a query, click the Show xDRs button. The result page will contain a summary displayed on the top of the screen and a table listing all of the calls and charges from a specified time period.
To browse for additional information about a call, with your mouse cursor point at the ![]() More Info icon next to the required xDR.
More Info icon next to the required xDR.
On the xDR history screen the operator can choose to download xDRs by clicking the Download button and get more information about service usage using the Service Usage Details button.


