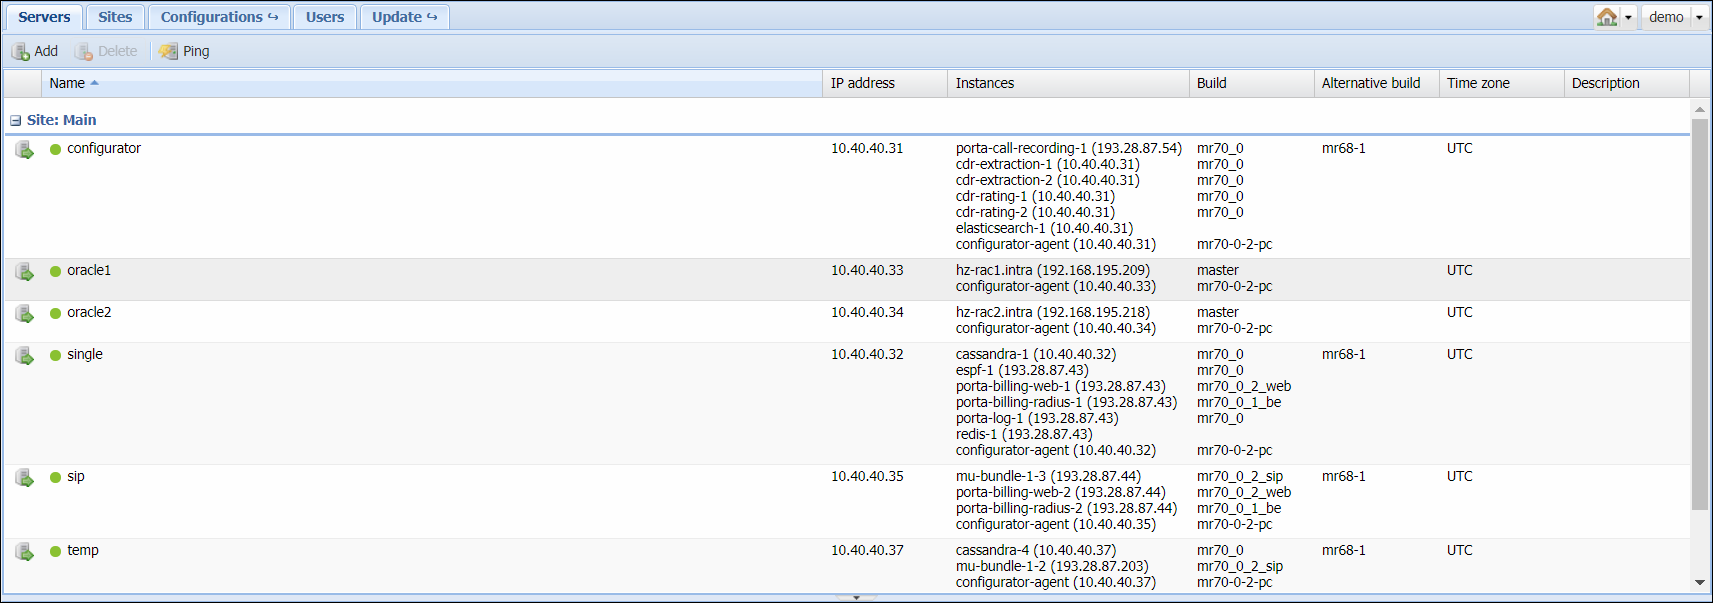
The information on the Servers tab shows all the servers that are part of your installation.
|
Field |
Description |
|---|---|
|
Name |
The name of the server. |
|
IP address |
The internal IP address of the server – this address is used on the internal LAN to manage the server from the configuration interface. |
|
Instances |
Shows all instances – services that run on your server (e.g., “web interface” or “SIP server”) and are assigned to a specific server. |
|
Build |
The current software version which is installed and used on the server. |
|
Alternative build |
Another software version currently installed on the server (on the inactive partition); a rollback to this version is possible. “N/A” means that the alternative partition does not contain any data. |
|
Time zone |
The time zone in which this server is operating. In order to provide optimal system response time for your online users, PortaBilling only performs resource-intensive calculations (such as creating statistics/invoices) during the preconfigured “off-peak” period. This field specifies the time zone in which the “off-peak” period is configured. |
|
Description |
A short description of the server. This field is optional. |
An indicator near the name of a server shows whether a specific server is reachable (green light) or unreachable (red light). The Servers page provides the following activities:
|
Field |
Description |
|---|---|
|
Add |
Allows you to add more servers. You will see a dialog box where you should enter the name of the server, its IP address, a short description, and specify a time zone; then click OK. |
|
Delete |
Allows you to delete the selected server. |
|
Ping |
Allows you to check the availability of the server. Just click on the Ping button and the Configuration server will attempt to verify that it can connect to this server and that the server responds to management commands. If you see a green light, the server is available; if red, then it is not available. |
Add/edit a new server
Prior to adding a new server, make sure you have installed the PortaSwitch software on it using the provided PortaSwitch installation ISO files.
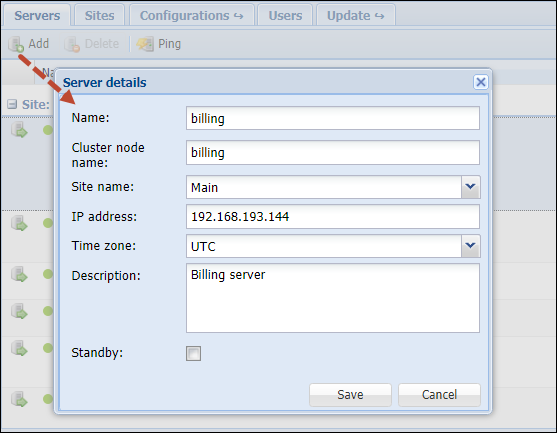
To add a new server, click the Add button in the toolbar and fill in the information about this server:
- Name – type in the new server’s name. To avoid confusing the system, do not use a name that begins with “porta-“.
- Cluster node name – this is the internal name for a server that’s part of a cluster. By default, it equals the name of the server. You can only define it when adding the server.
- IP address – when adding a server to the installation on this page, an IP is specified. This IP is automatically considered internal, so it (and its NIC) becomes read-only in the Network configuration UI.
- Select the site where the server is located, a time zone in which this server is operating, and its description.
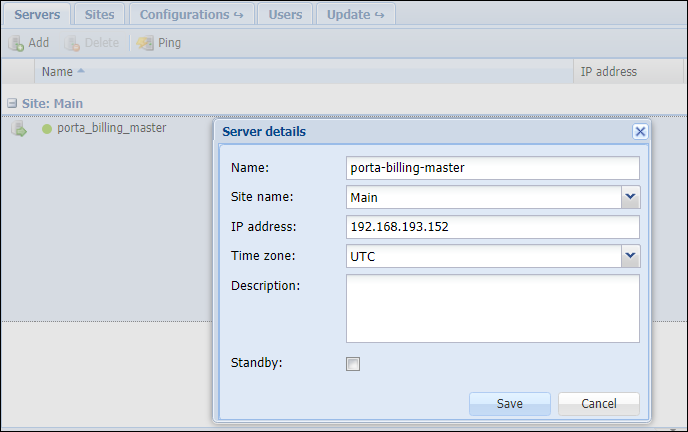
To edit an existing server’s attributes, double-click on the row that has the server you want to modify.
Additional server configuration
When clicking the ![]() Server Information button, an additional block opens. This block contains several tabs with different server properties. You can switch between these tabs to access the corresponding information.
Server Information button, an additional block opens. This block contains several tabs with different server properties. You can switch between these tabs to access the corresponding information.
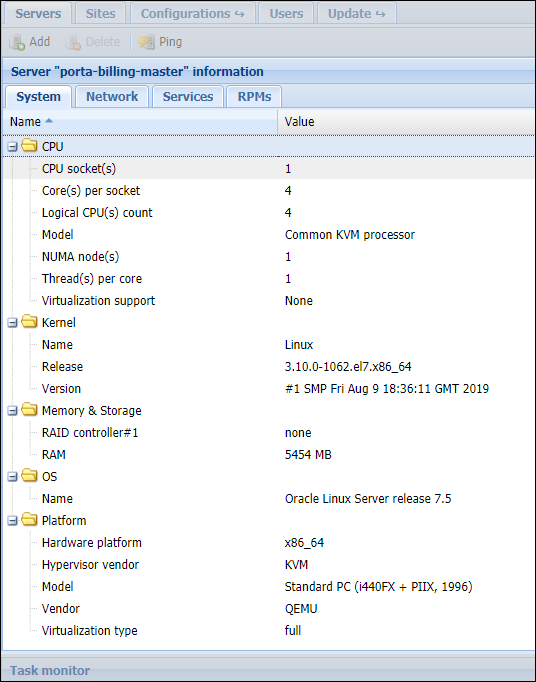
The System tab displays basic hardware and software information about the selected server:
The Network tab shows all the IP addresses configured for the selected server.
They are grouped by network interface. The following columns are shown:
- IP Address
- Cluster IP address (specifies if this IP address is dedicated to a cluster)
To change either the IP address and/or the subnet mask, just double-click on the specific list element. Edit the parameters in the pop-up window and then press OK.
The Add ![]() button in the toolbar allows you to add a new IP address to a network interface (only those network interfaces that do not have an internal IP address are available) or to add virtual interfaces.
button in the toolbar allows you to add a new IP address to a network interface (only those network interfaces that do not have an internal IP address are available) or to add virtual interfaces.
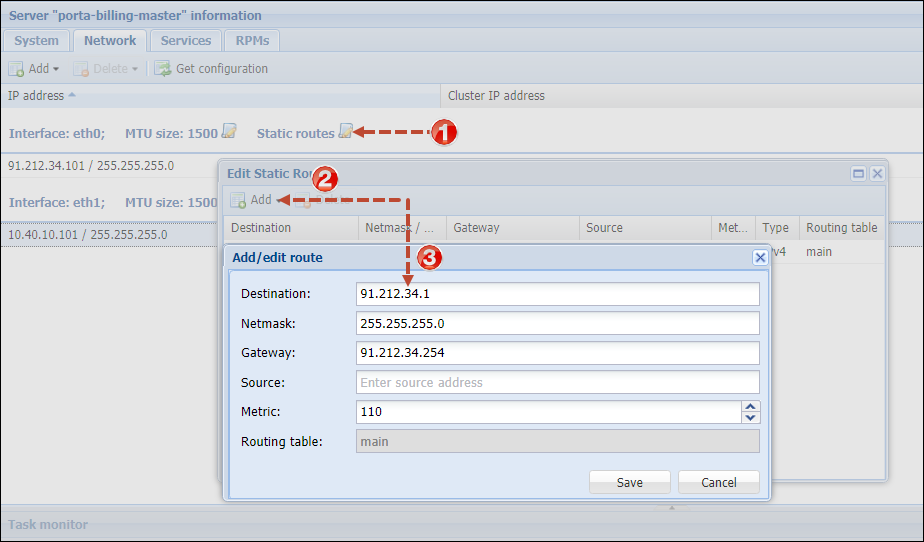
To add and/or modify static routes for a specific server, click the ![]() Static routes icon.
Static routes icon.
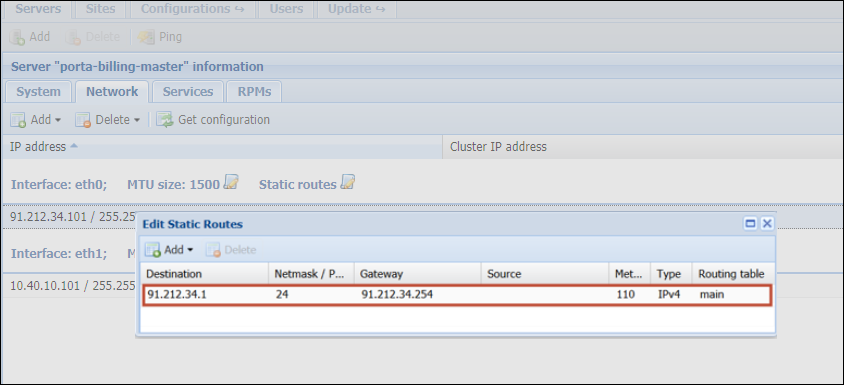
To add a new static route, click the Add ![]() button and select the route type (IPv4, IPv6). Specify the required parameters in the pop-up window and click Save.
button and select the route type (IPv4, IPv6). Specify the required parameters in the pop-up window and click Save.
To change the parameters later on, double-click on the row of the static route you wish to modify.
The Network page provides the following:
|
Field |
Description |
|---|---|
|
Add |
Allows you to add a new IP address to a network interface or add virtual interfaces (VLANs for trunking) and/or network bonding (link aggregation). |
|
Delete |
Allows you to delete the selected IP address (not available for internal IP addresses). |
|
Get configuration |
Gathers information about current network configurations from all servers and updates block content accordingly. Any changes made on the Network tab without applying a new configuration will be lost.
|
Using the Services tab you can control the services that are located on the selected server.
The Services tab provides the following activities:
|
Field |
Description |
|---|---|
|
Updates and shows the statuses of all services on the server. |
|
|
Updates and shows the status of the currently selected service. |
|
|
Re-reads certain configuration parameters without an actual restart. |
|
|
Restarts the currently selected service. |
|
|
Starts the currently selected service. |
|
|
Stops the currently selected service. |
Services are grouped by instances created on the server. The top Common group contains general services.
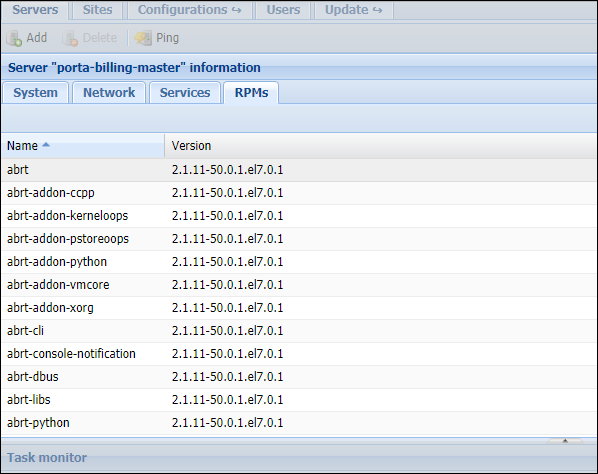
The RPMs tab displays RPM packages installed on the selected server.


