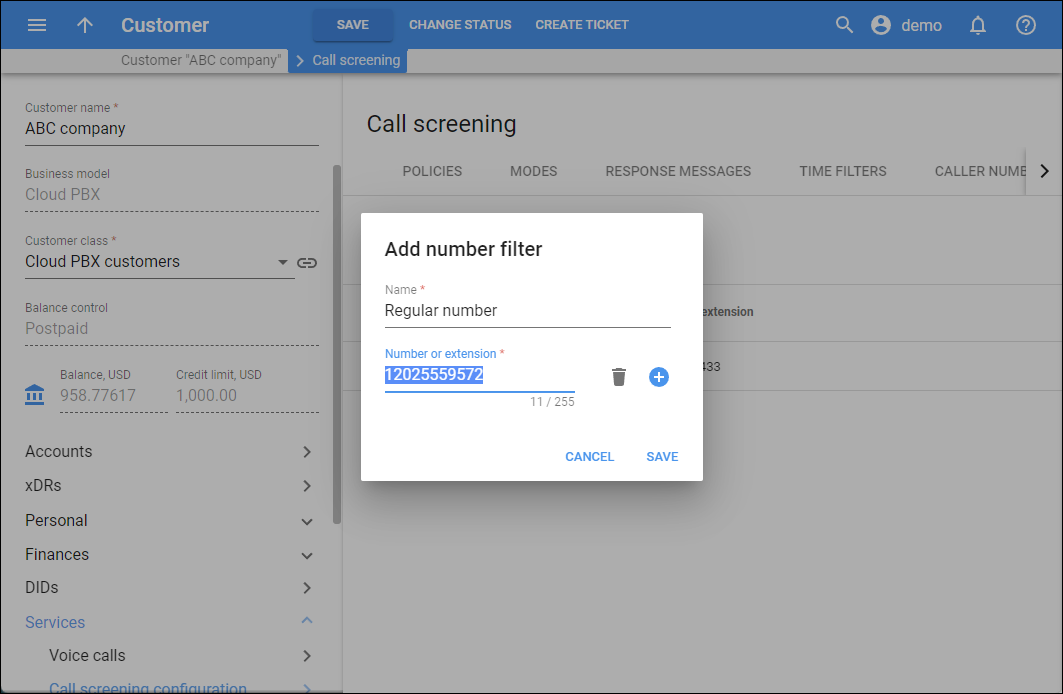
On this tab, you can add the called numbers, so they can be then used in the call screening rules (see the Policies tab > How to add a new rule).
Adding the called numbers can be useful if you have multiple account aliases (or DID numbers) forwarded to your main account. For example, if you want to treat incoming calls to your business toll-free number differently from calls to your regular phone number, you can create two different call screening rules with the corresponding called numbers.

How to add numbers
To add a called number/extension (or a set of called numbers/extensions) that you will be able to use as a filter (condition) in call screening rules, click Add number(s). In the dialog that opens:
- Fill in the following details:
- Name – specify the name of the called number filter, that you will be able to choose when creating a call screening rule on the Call screening policy tab.
- Number or extension – specify a phone number/extension. To add more numbers/extensions to the same called number filter, click Add
 . To remove a number/extension, click Delete
  .
.
- Click Save.

Called number list
Here’s the list of already created called number filters (that contain one or more phone numbers/extensions). For each number filter in the list, you can see:
Name
The name of the number filter.
Number or extension
One or more phone numbers/extensions that are included in the number filter.
To edit the number filter, hover over it, and click Edit . In the dialog that opens, specify the details, and click Save.
To delete a number filter, click Delete ![]() . Note that you can’t delete a number filter if it’s already used in some Call screening policy.
. Note that you can’t delete a number filter if it’s already used in some Call screening policy.
Customize the panel
- Change table settings – click Settings
 in the title bar to customize columns and change row style.
 - Re-order the columns – drag-and-drop the column headers right or left to place the columns in the order you want.
- Re-order the rows – click Arrow
(or
) next to the column header to re-sort the rows. For example, the response messages list displays in alphabetical order. You can re-sort them in the reverse order.


