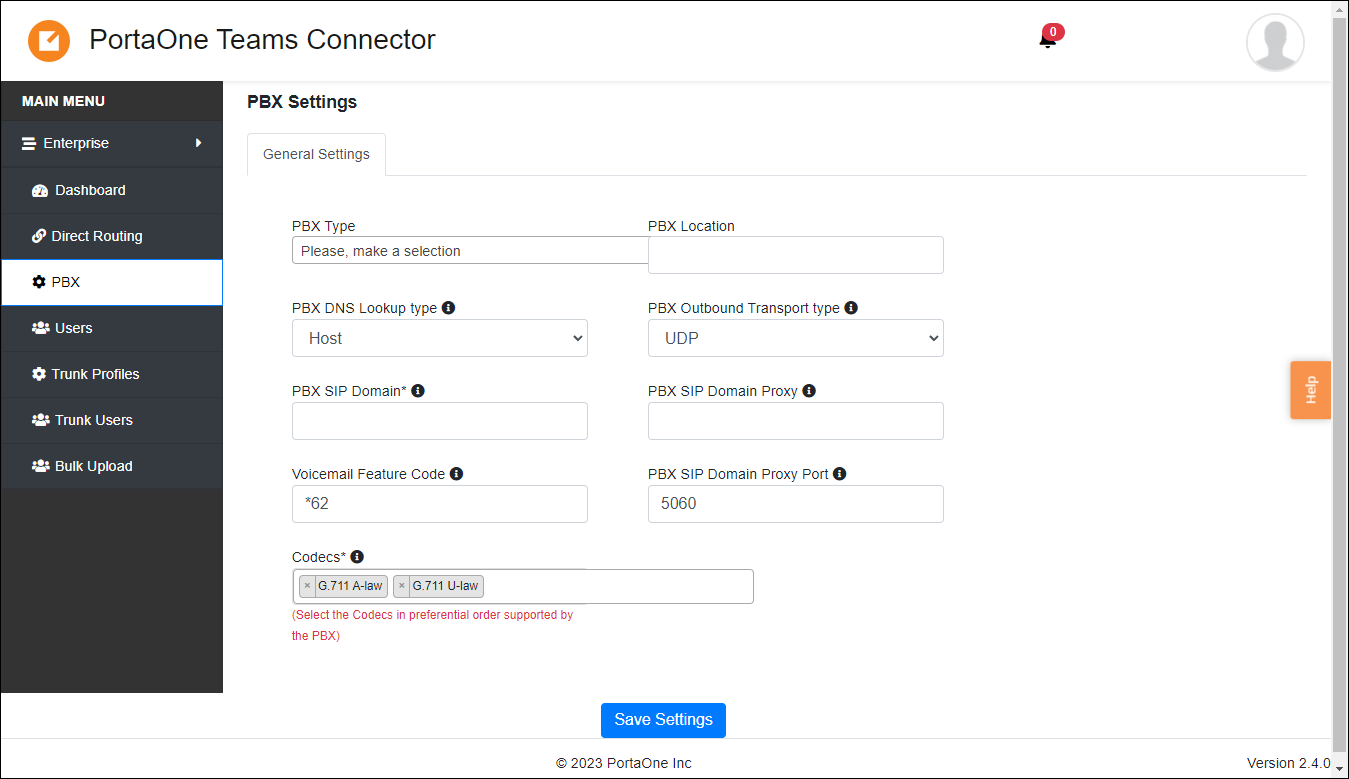
Even though your customers have the ability to add PBX instances on the Enterprise portal, we recommend that you do it yourself on the Reseller portal, since you already have all the required configuration details, which may take your customers a longer time to find.
To add a PBX for your customer (Enterprise):
6.1 Log in with your Reseller credentials to the Reseller portal.
6.2 Go to Enterprises >> open a specific Enterprise (customer record) >> click PBX on the navigation panel >> click Add PBX.

6.3 Fill in the details:
- PBX Type – select “PortaSwitch”.
- PBX Location – you can specify a generic name if a single PBX is used (if you plan to add multiple PBXes, specify a descriptive PBX location name).
- PBX Transport Type – this is the protocol that PBX supports for user registration. The most common protocol is UDP. See the details here.
- PBX DNS Lookup Type – this is a method that is used to look up the SIP registration location. Select Host.
- PBX SIP Domain – specify the PortaSwitch SIP domain (SIP users will be created with this domain).
- PBX SIP Domain Proxy – if you are using an SBC or a SIP Proxy, enter the IP address here, otherwise, specify the same value as in the PBX SIP Domain field.
- Voicemail Feature Code – this is the service code that Teams users can dial to check voicemail. Specify *98.
- PBX SIP Domain Proxy Port – enter 5060. Most PBXes use a standard port. If your PBX uses a different port, change the value to the correct port.

6.4 Click Save.
After that, you will see the notification about the successfully added PBX.


