After your customer has configured Direct Routing, set up the trunk profile with information from the customer’s main SIP trunking account.
Specifics
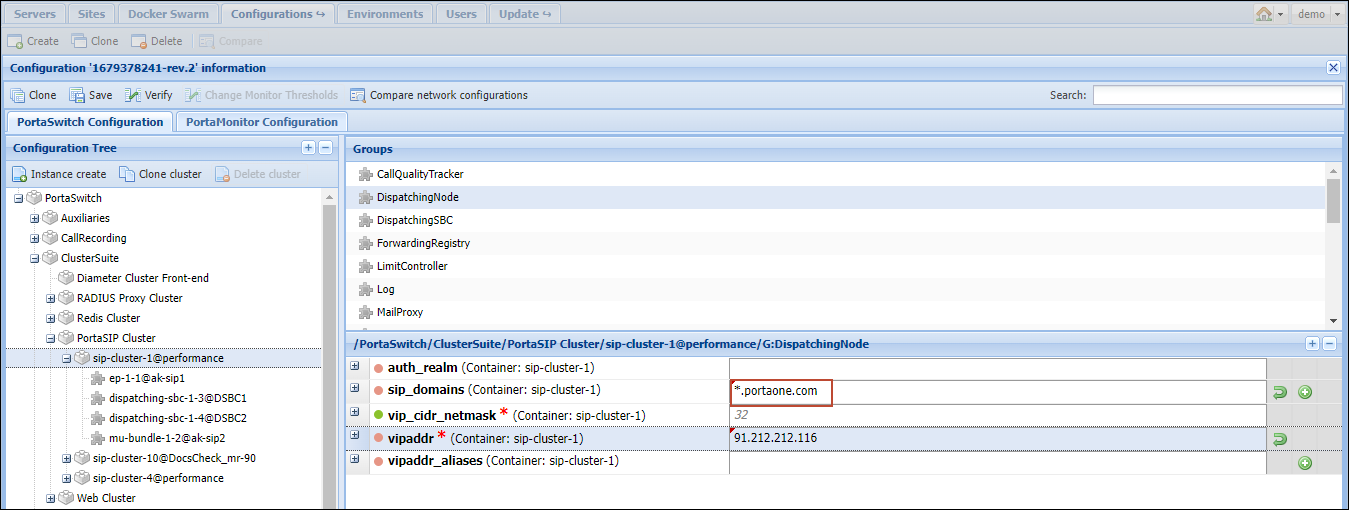
For each Trunk profile you create, you need a unique domain name associated with the IP address of the SIP node.
To define a set of domain names, list them in the DispatchingNode.sip_domains field on the Configuration server web interface.

Contact PortaOne support team if you need assistance.
Configuration
To add a trunk profile for your customer (Enterprise):
6.1 Log in with your Reseller credentials to the Reseller portal.
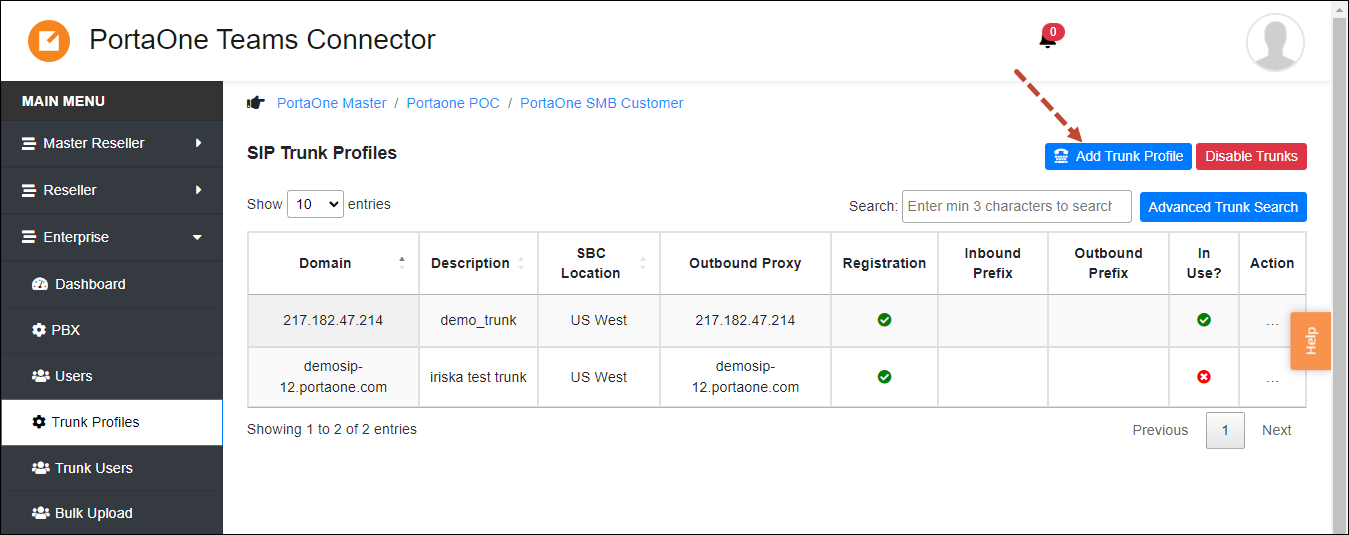
6.2 Go to Enterprises >> open a specific Enterprise (customer record) >> click Trunk Profiles > click Add Trunk profile.

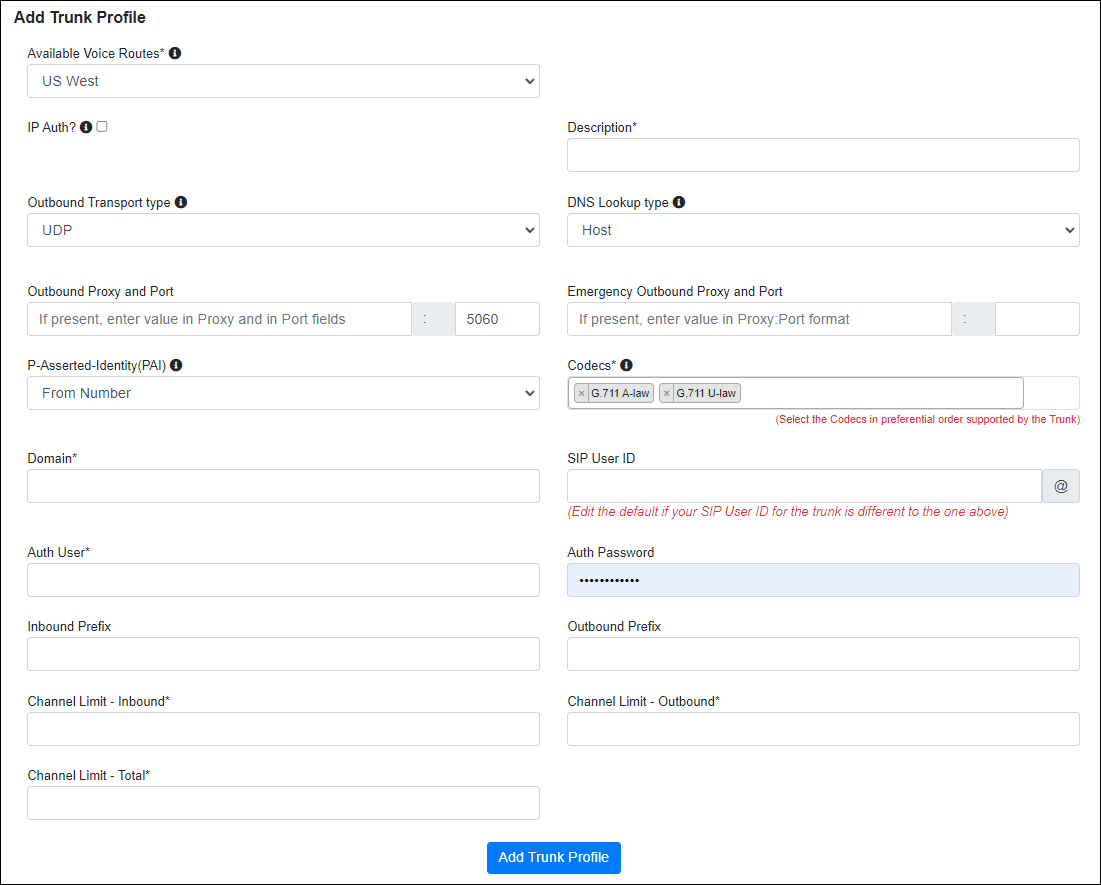
6.3 Fill in the details:
- Available Voice Routes – select the voice route from the list (the voice routes are defined while adding an Enterprise in the SBC Region field).
- IP Auth? – select the checkbox for the trunk to use IP authentication.
- Description – add a description for this trunk, e.g., “Customer Service Trunk”.
- Outbound Transport type – choose the protocol used for transmitting SIP messages for outgoing calls via the trunk. The most common protocol is UDP.
- DNS Lookup type – this is a method that is used to look up the SIP registration location. Select Host.
- Outbound Proxy – this is optional. If you are using a SIP Proxy, enter the IP address and port here.
- Emergency Outbound Proxy and Port – this is optional. If you use an emergency SIP proxy, enter the IP address and port here.
- P-Asserted-Identity – choose what value (or none) should be sent in the P-Asserted-Identity (PAI) SIP header in the outgoing INVITE requests.
- Codecs – leave the default codecs. You can also select your codecs in order of preference; codecs will be tried in the defined order.
- Domain – specify the domain name / IP address of the SIP node.
- Auth User – specify the SIP username (the ID of the main SIP trunking account in PortaBilling).
- SIP User ID – this field will be populated automatically once you fill in the Auth User and Domain fields. Review for accuracy before submitting. You can change the SIP username to SIP user ID if these are different values.
- Auth Password – specify the service password for the main SIP trunking account in PortaBilling.
- Inbound Prefix – optionally, you can specify the country code.
- Outbound Prefix – if a particular code is necessary before placing an outgoing call (e.g., press “9” to make an external call), specify it here.
- Channel Limit – Inbound – specify how many incoming calls the trunk users can handle simultaneously.
- Channel Limit – Outbound – specify how many outgoing calls the trunk users can make simultaneously.
- Channel Limit – Total – specify how many incoming and outgoing calls the trunk users can handle simultaneously.

6.4 Click Add Trunk Profile.
You can check whether the trunk has been registered successfully on the Trunk Profiles page.


