Once you add a Trunk profile, assign DID numbers to it. These are the DID numbers that will be available for the trunk users. Set the DID number that will be used for outgoing calls (main SIP trunking account in PortaBilling) as default.
To assign DID numbers to a Trunk Profile:
7.1 Log in with your Reseller credentials to the Reseller portal.
7.2 Go to Enterprises >> open a specific Enterprise (customer record) >> click Trunk profiles on the navigation panel.
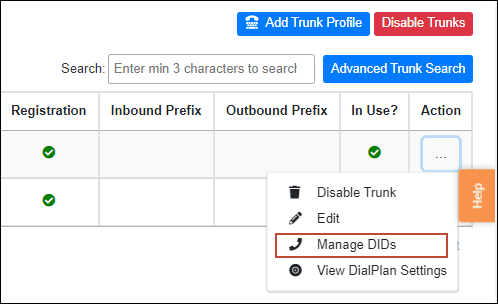
7.3 Find the needed Trunk Profile in the list >> click Action ![]() >> Manage DIDs.
>> Manage DIDs.

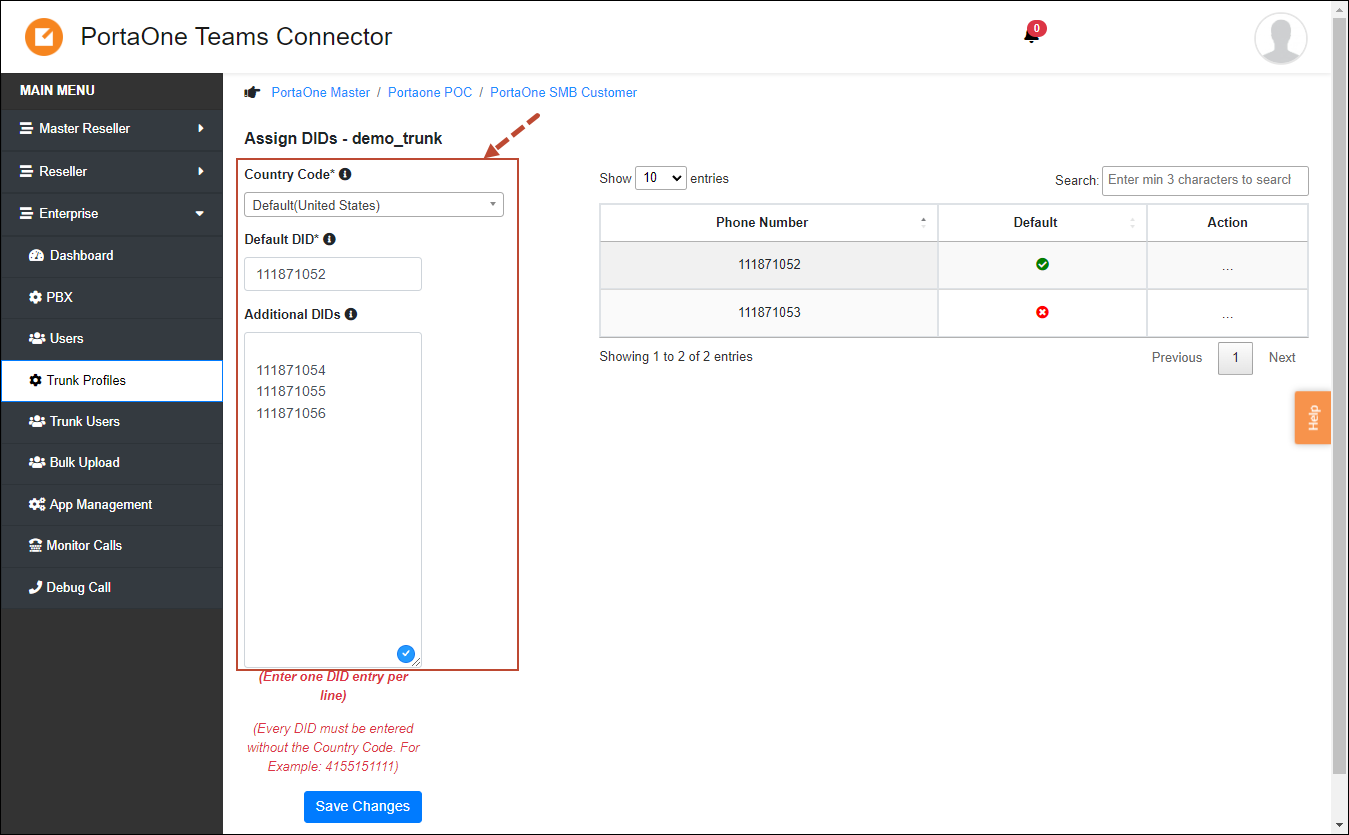
7.4 Fill in the fields:
- Country code – select the country so that the country code, e.g., 44 for UK, will be used for DID numbers.
- Default DID – specify the default DID number that will be used for outgoing calls authorization (the ID of the main SIP trunking account).
- Additional DIDs – specify additional DID numbers that will be available for the Trunk users (the IDs of accounts created for extra DIDs). Add each DID number as a separate line.

7.5 Click Save Changes.
Now, your customers can assign DID numbers to trunk users on the Enterprise portal and start using the service.
How to remove a DID number
Click Action ![]() next to the desired DID >> click Remove DID.
next to the desired DID >> click Remove DID.


