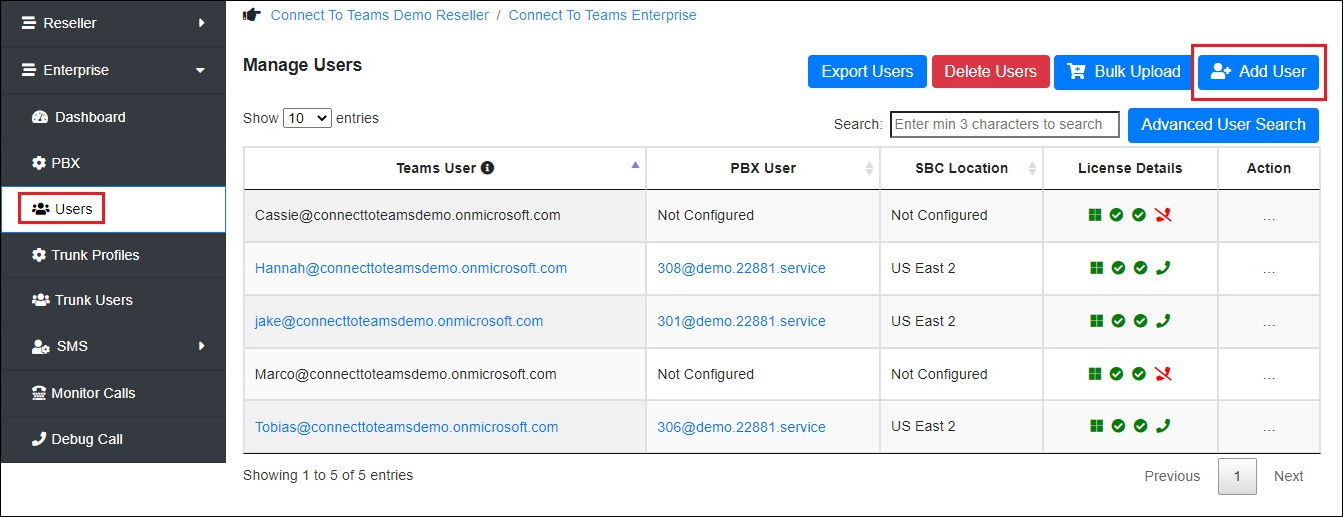
Even though your customers have the ability to add PBX users on the Enterprise portal, we recommend that you do it yourself on the Reseller portal, since you already have all the required configuration details, which may take your customers a longer time to find.
Each user record will be automatically connected to the corresponding PortaSwitch account (extension).
Adding users individually
To add PBX users for your customer as Reseller:
7.1 Log in with your Reseller credentials to the Reseller portal.
7.2 Go to Enterprises >> open a specific Enterprise (customer record) >> click Users on the navigation panel >> click Add user.

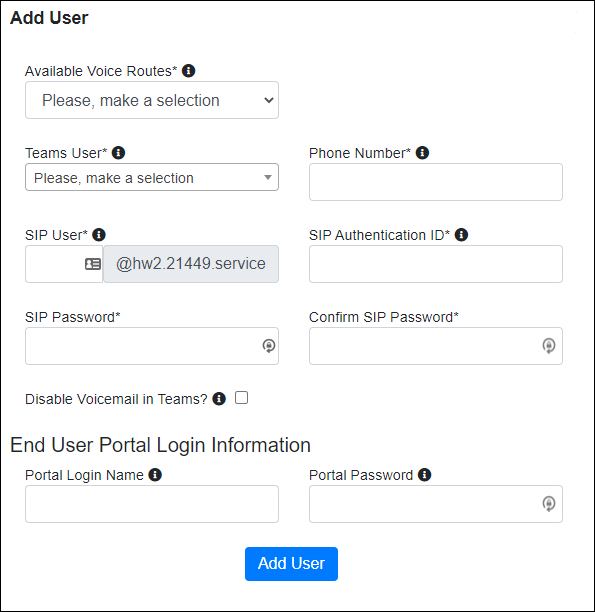
7.3 Fill in the details:
- PBX Locations – choose one of the PBX instances from the list (the corresponding IP/domain will be automatically displayed in the SIP User field below).
- Available Voice Routes – select the voice route from the list (the voice routes are defined while adding an Enterprise in the SBC Region field).
- Teams User – select the Teams user, identified by the email address (the users are automatically pulled up from the customer’s Microsoft Office 365 Admin Center).
- Phone Number – this number will be displayed in the Teams app as the user’s number. You can specify the phone number in the E.146 format +(country code)(area code)(local number), e.g., “+14133316100”, or as an extension, e.g., 1008.
- SIP User (the SIP username) – specify the PortaBilling account ID. It will be followed by the PortaSwitch domain name/IP address that is populated automatically once you select a value in the PBX Locations field).
Once the user record is saved, the SIP user value can’t be modified, so in case you need to change it, you will need to delete the user records and create it again.
- SIP Authentication ID – specify the PortaBilling account ID. It will only be used to authenticate the PortaBilling account and won’t be displayed in Teams.
SIP Password – specify the service password for the PortaBilling account.
7.4 Click Add User.
Uploading users in bulk
Prepare a CSV file for the bulk user upload and upload users on the Reseller portal as described here.
The values in the file columns are the same as described in the Adding users individually chapter.


