Results
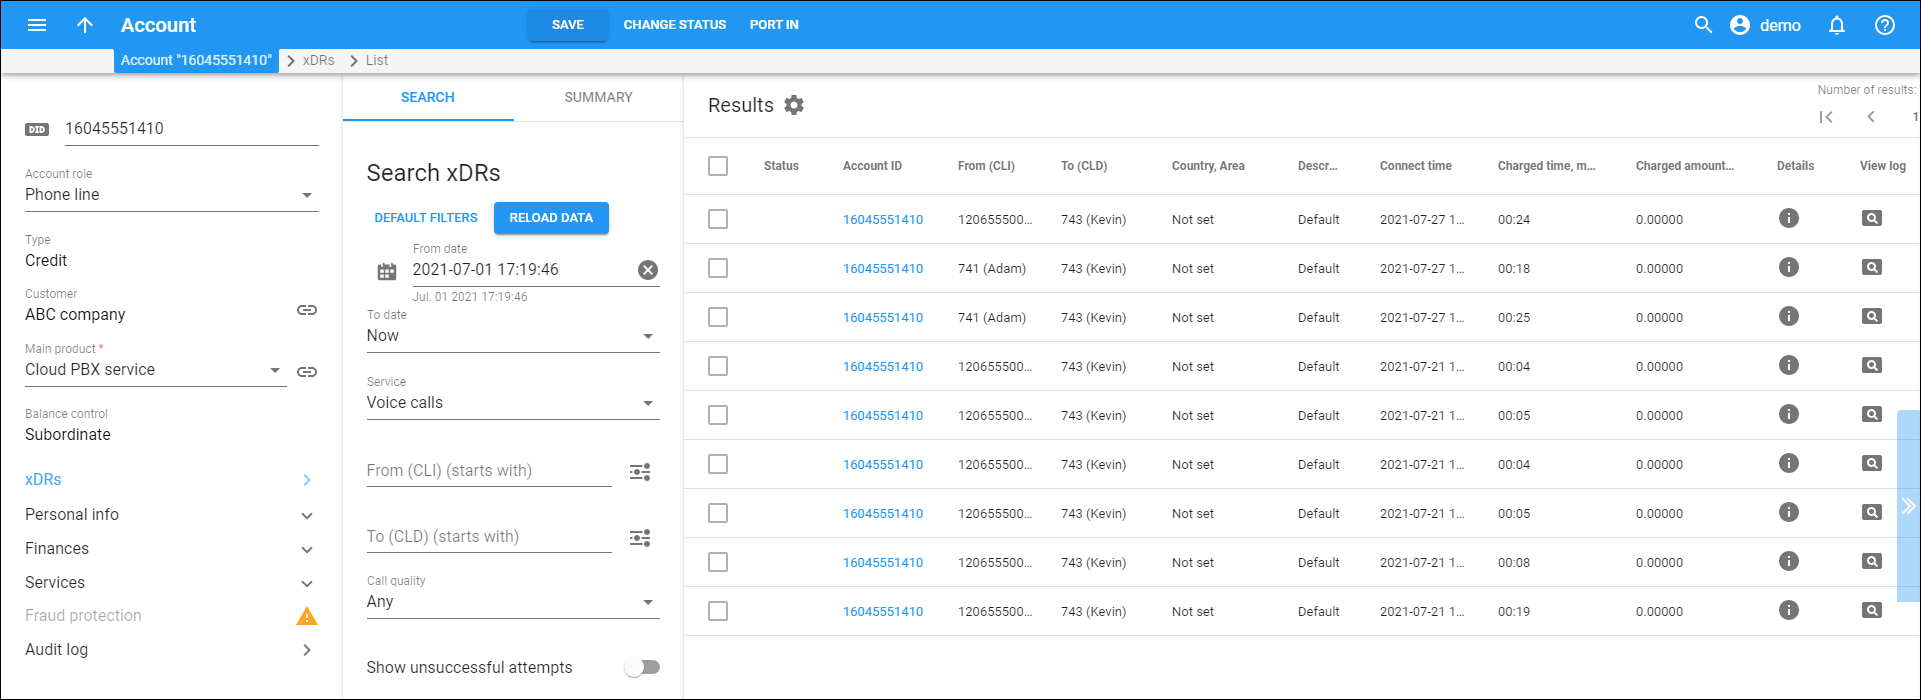
On the Results panel you can browse the filtered list of xDRs. Here you can see a session details, open the session log and reverse one or several xDRs.
The columns in the table differ, depending on the selected service. These columns are common:
- Service – this column is only displayed when “Any” is selected in the Service field on the Search panel. It shows the name of the service, e.g., “Voice calls,” or transaction type, e.g., “Credits/Adjustments.”
- Status – this column is only displayed when a specific service is selected in the Service field on the Search panel. It indicates that the xDR has been Reverted
 or reverted and Hidden
 (both the original and correction xDRs are marked as “Hidden”). Refer to the Reverse an xDR chapter for more details.
- Account ID – the ID of the account charged. The ID is the link to this account’s page.
- From (CLI) – specify the phone number of the party calling.
- To (CLD) – specify the phone number for the called party.
- Date – the date of the transaction.
- Charged amount – the sum of charges applied.
- Details – click Info
to view detailed information about the session. There you see general information about the session, such as time zone, transaction status and/or error code, duration, etc. Click the tabs in the details window to see session details for an account, reseller and vendor, separately. Find available auxiliary information about a session:
- information about roaming country and carrier,
- information about cloud PBX calls such as hunt group or extension number that made, accepted or redirected the call, as well as information about split sessions, if available.
The Details column is available for xDRs for Voice calls, Messaging, Netaccess and Conferencing service types.
- View log – click View
to view the log of this session in the Log viewer.
Reverse an xDR
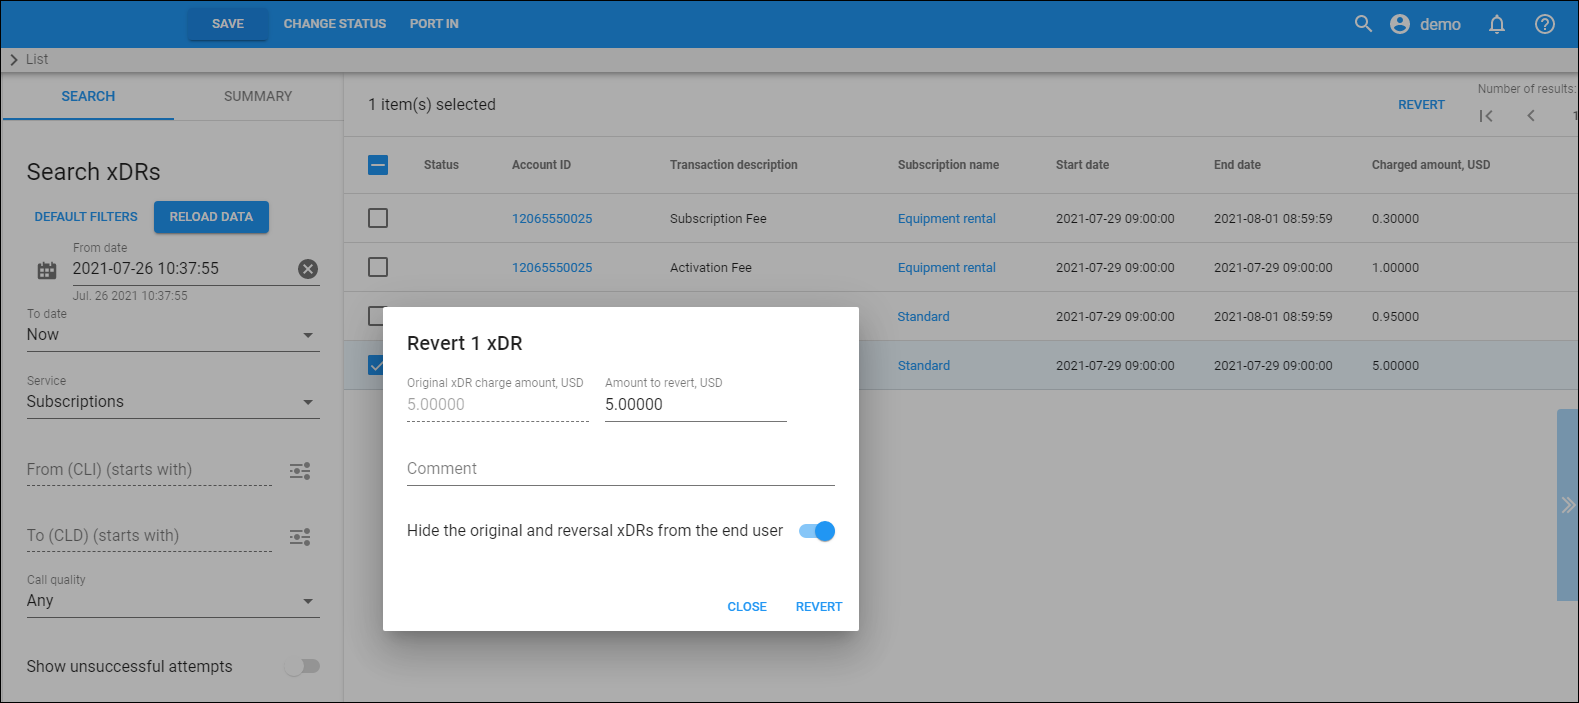
To reverse an xDR, select it from the list and click Revert. Comment about your actions (e.g., the reverse reason).
To reverse the xDR as if it never happened, turn on the Hide the original and reversal xDRs from the end user toggle switch. This marks the original and correction xDRs as Hidden . End users will neither see these xDRs in their invoices, nor on self-care interfaces nor in statistics. This option is only available when a reverse transaction amount is equal to an original transaction(s) amount and all of the transaction xDRs are included in an open billing period or invoice under review.
Note that you must be very careful with the Hide the original and reversal xDRs from the end user option. Once an xDR becomes hidden, it’s not possible to reverse it. So if you reverse a transaction by mistake and mark it as hidden, you can only correct this by manually charging for the transaction amount or by importing an analogous xDR.
Customize the panel
Change table settings – click Settings in the title bar to customize columns and change row style.
Re-order the columns – drag-and-drop the column headers right or left to place the columns in the order you want.
Re-order the rows – click Arrow (or
) next to the column header to re-sort the rows. For example, the xDRs list panel displays xDRs in ascending order. You can re-sort them in the reverse order.
Change the default number of results globally – use the Number of results drop-down list in the upper right corner to adjust the maximum number of rows that appear on the panel. By default, the panel displays 25 rows. Once the number is changed, it's automatically saved, so the same number of rows is shown for PortaBilling entities, e.g., customer, account, reseller, etc.


