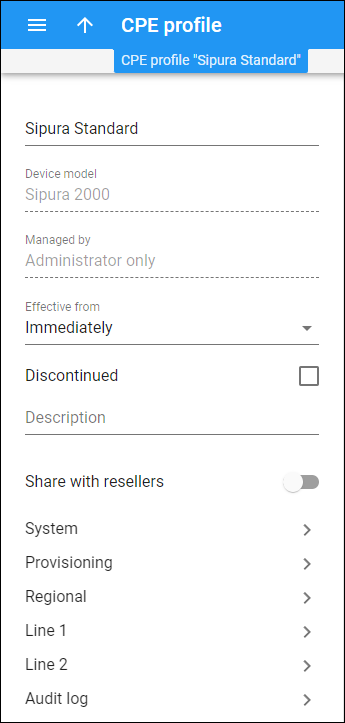
Profile name
Edit the CPE profile name. The name should be unique.
Device model
The device model this CPE profile is used for. You can’t change the device model for the created CPE profile.
Managed by
This shows whether the CPE profile is managed by administrator only or a specific reseller. You can’t change this for the created CPE profile.
Effective from
Specify when this CPE profile becomes effective.
The default option when a CPE profile is created is Immediately. To choose a specific date and time, select Specific time in the dropdown list. Click Calendar to set the date and time, or type it in the “yyyy-mm-dd hh:mm:ss” format (2019-03-19 00:00:00).
Discontinued
Select the checkbox to mark the CPE profile as Discontinued. You can’t assign a discontinued profile to devices. It can still be used by devices it was previously assigned to.
Description
Add/edit a short description of the CPE profile.
Share with resellers
This option is available for CPE profiles managed by the administrator. To make such a CPE profile available also to all resellers, turn on the Shared with resellers toggle switch.
Configuration parameters
The configuration parameters differ depending on the device model. For example, see the configuration parameters for Sipura-2000 devices in the Auto-provisioning of IP phones handbook.
End users may want to configure specific options (e.g., soft keys) according to their preferences. You can specify options to be auto-provisioned by PortaSwitch (e.g., the addresses of SIP servers, codecs, passwords) and exclude options that end users configure themselves. Thus, if an end user configures soft keys for their IP phone, those changes remain after the IP phone configuration update. See the Partial CPE profile configuration handbook section for more details.
Clone a CPE profile
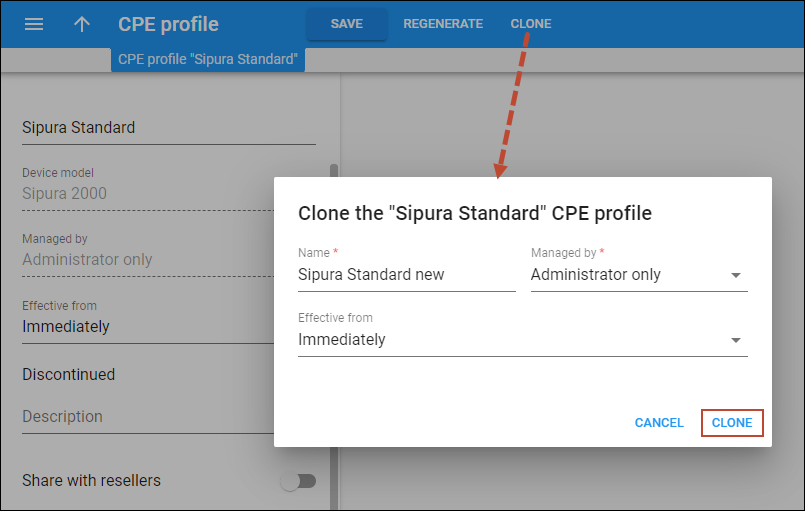
You can create a new CPE profile by cloning the current one:
- click Clone on the toolbar;
- in the dialog window that opens:
- specify the CPE profile name;
- select who can manage the new CPE profile in the Managed by field;
- specify when this CPE profile becomes effective;
- click Clone to confirm.
The cloned profile inherits all the parameters of the original profile and can be customized later.
Regenerate configuration files for IP phones when a CPE profile is updated
When an IP phone with the specified CPE profile is assigned to an account for auto-provisioning, a configuration file with a specific set of parameters is generated for the IP phone. When the IP phone is connected to the Internet, it retrieves its configuration file from the provisioning server.
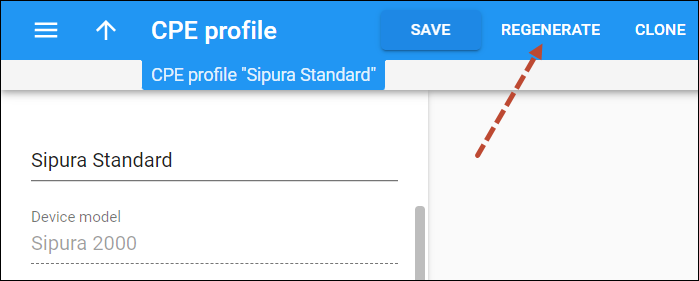
To apply changes to a CPE profile that is assigned to IP phones in use, save these changes and then click Regenerate on the toolbar. As a result, configuration files will be regenerated for these IP phones.
Open the notification panel to see the result.


