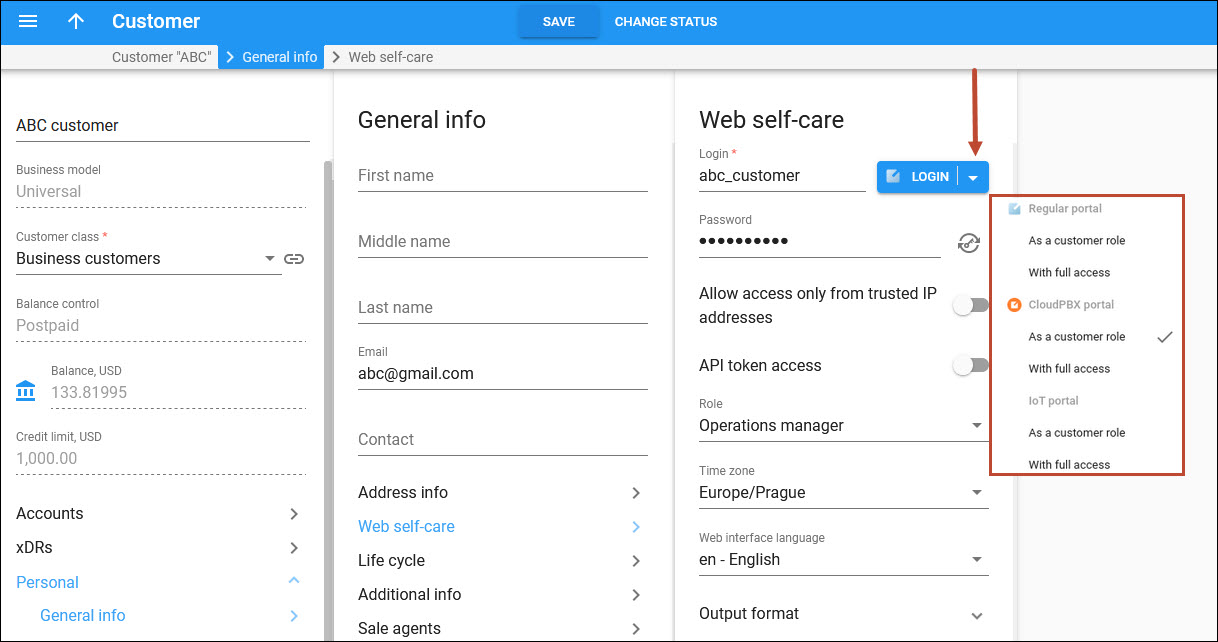
On the Web self-care panel, you can define credentials and preferred settings (such as language, time zone, date input, and output formats) for this customer's self-care interface.
Login
The customer self-care interface login.
Access web self-care as a customer. After you defined the credentials, you can log in to the self-care interface on behalf of the customer. Click Login  to access it in one of the modes:
-
Log in using the assigned role – this mode appears only if you defined a new access role for the customer. You log in to the self-care with the same permissions that the customer currently has. This comes useful if you need to check the customer's access level.
-
Log in using the default role – you can log in to the self-care interface with the default access role even if the customer now has a different role assigned. This may be useful for troubleshooting or if you assist the customer with their configuration.
The administrator can automatically log in to any custom self-care portal with just a single click right from the PortaBilling web interface. There is no need to contact the customer for the portal password or to store it with the portal URL for future use. This saves troubleshooting time and enables the administrator to assist customers faster.
The administrator can see all custom self-care portals that are available for a specific customer role by clicking on the arrow ![]() of the login button. The administrator can log in either with a customer role or with the full access option.
of the login button. The administrator can log in either with a customer role or with the full access option.
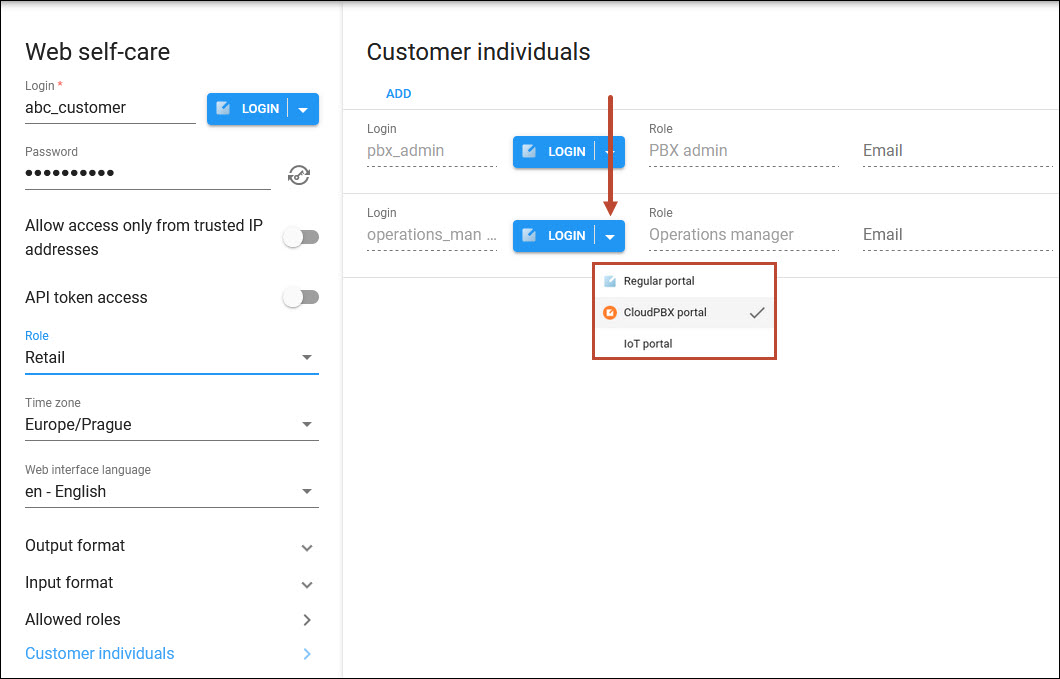
The administrator can also log in as one of the customer individuals.
To configure access to the custom self-care portals, refer to the Control what custom portal functionality is visible according to user permissions chapter.
Password
The customer self-care interface password. Define it manually or click to generate a random, hard-to-guess password.
To show or hide the password, click .
Two-factor authentication (2FA)
You can enable 2FA for the customer, so they will be able to log in to their self-care interface only after entering a one-time password (OTP) in addition to their login and regular password. The OTP is generated by a 2FA application installed on the user’s smartphone, e.g., Google Authenticator.
Select one of the following options in the dropdown list:
- As defined by the customer class – the option configured for the customer class is used.
- Yes – select this option to enable 2FA.
- No – select this option to disable 2FA.
If a user loses access to the 2FA application, click Reset 2FA key.
Allow access only from trusted IP addresses
This ensures that the customer accesses the self-care interface only from physical locations that you define. For example, you can specify IP addresses that belong to your network. If the customer tries to log in from outside your network, PortaBilling denies that access and the customer cannot log in.
Use these formats to permit access from specific IP addresses or networks:
-
A single IP address: 10.10.10.1
-
A network in IP prefix (slash) notation: 192.168.192.0/24
-
An IP address and a netmask: 192.168.192.0/255.255.255.0
You can enter multiple definitions, with one starting on a new line and ending with a semicolon.
API token access
Use API tokens to authenticate customer applications (e.g., CRM systems, switchboard apps) that are integrated with PortaBilling via the API. The application then uses the combination of the API token and login to establish the API session.
Role
The access role assigned to this customer. It contains the set of permissions to access self-care components: tabs, features, etc. Each customer is created with a default role. After you create a new role on the Roles panel, select a new role for the customer from the list here.
Time zone
Set the time zone in which to display the date and time values on the customer self-care interface.
Web interface language
Choose a desired language for the customer self-care interface.
Output format
Choose an output date and time format for the customer self-care interface.
Input format
Choose an input date and time format for the customer self-care interface.
Allowed roles
On this panel, you can assign roles to the customer which they can use for their individuals.
Customer individuals
On this panel, you can create customer individuals with individual credentials and role-based permissions to access the customer self-care portal.


