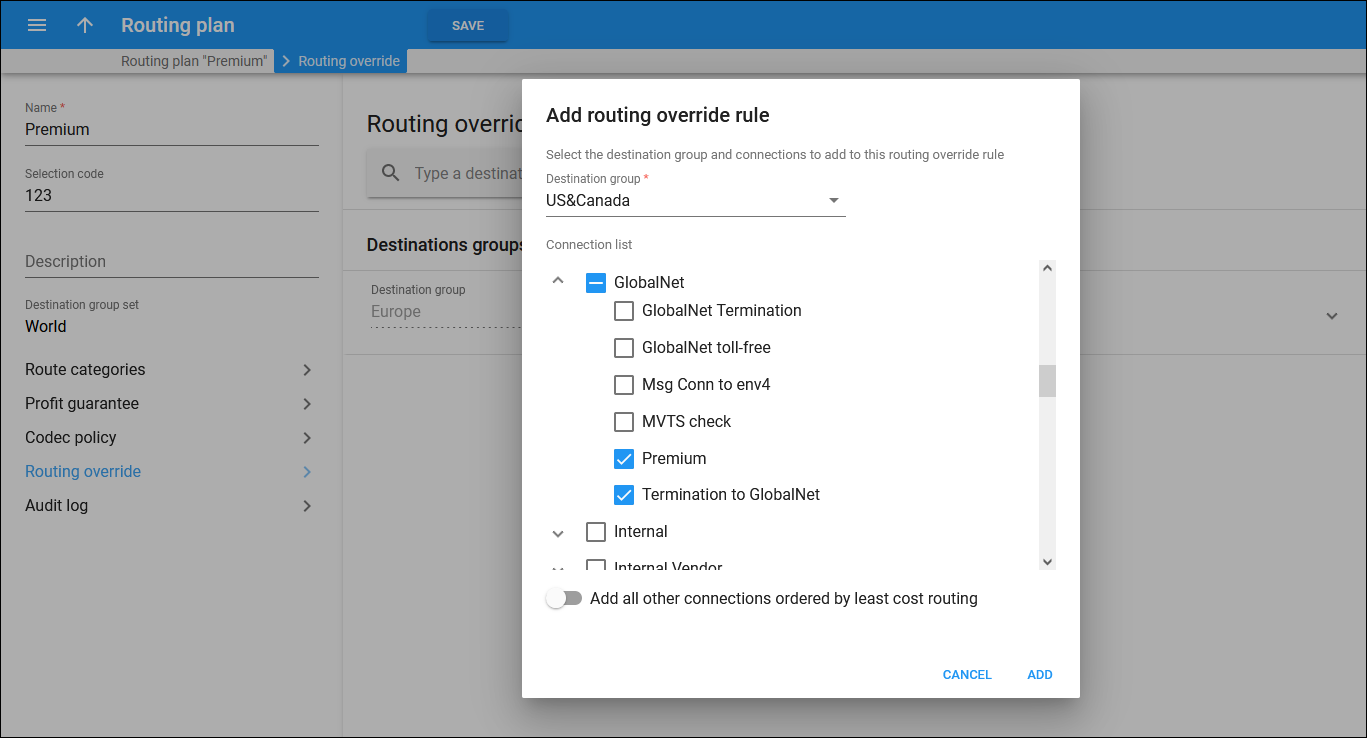
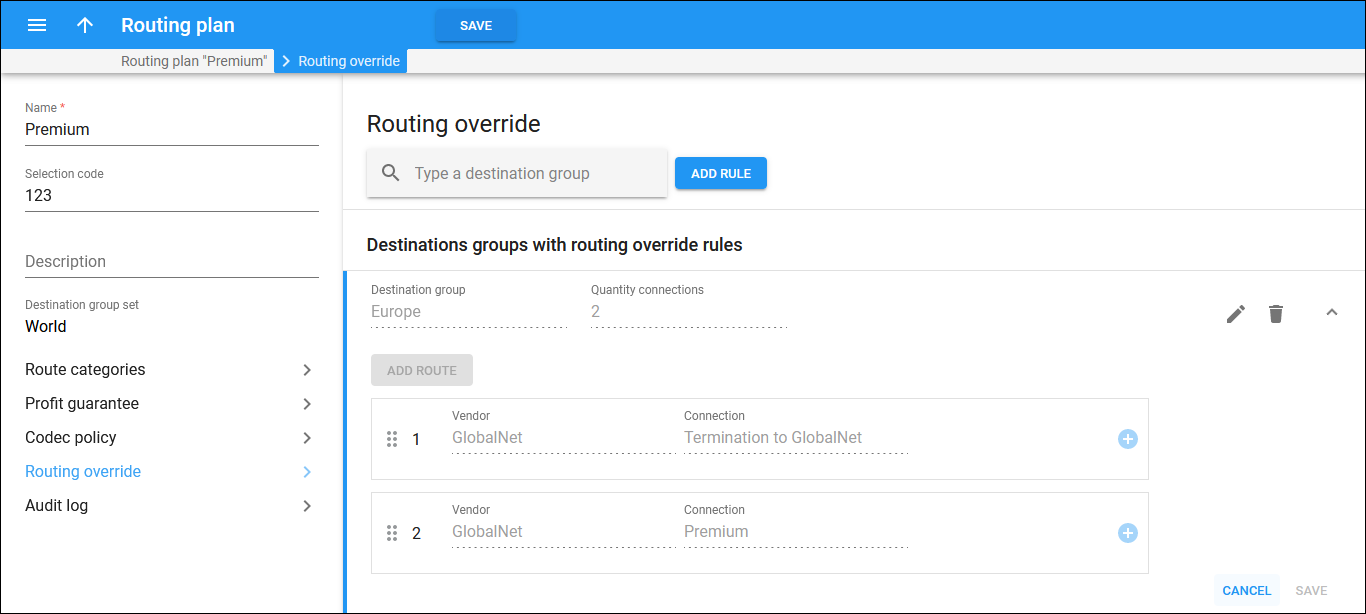
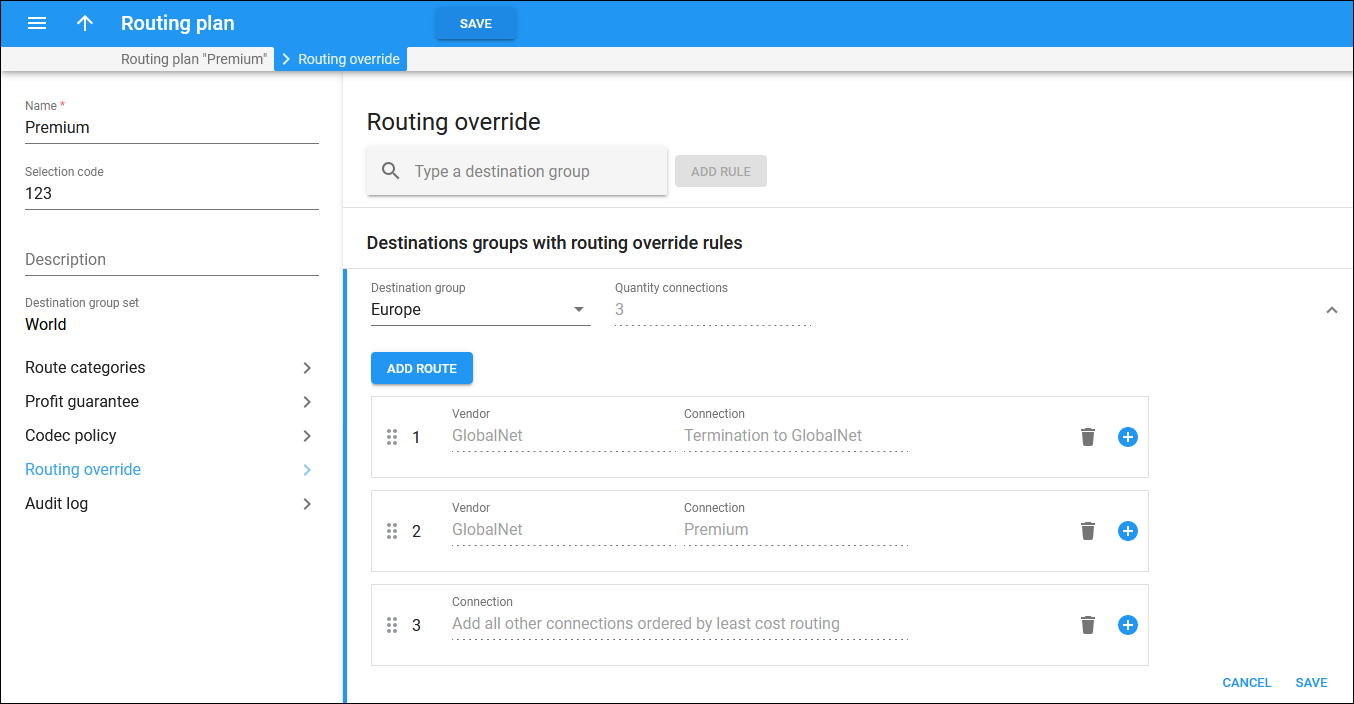
This panel is available for routing plans created with the enabled Least cost routing override option and selected destination group set.
On this panel, you can add the custom routing rules for specific destination groups from the selected destination group set. Refer to the Routing override handbook for detailed configuration of the following routing override types – Percentage-based routing, Consistent routing to one carrier, and Sequential routing.
To search for a specific destination group with already specified routing override rules, type a destination group name (fully or partially) in the search field.
To add a new routing override rule, click Add rule.
In the Add routing override rule dialog, select a destination group from the dropdown, and select specific vendors’ connections through which the calls can be routed. You’ll then be able to change the connections order in the created routing override rule.
If you want to add all other connections (except for the selected ones) as a single group ordered according to the LCR (from the lowest to the highest price), turn on the Add all other connections ordered by least cost routing toggle.
Click Add to confirm.
Destination groups with routing override rules
Here you can view the routing override rules and edit them, e.g., choose a different destination group, add routes to a routing override rule and change their order.
To choose a different destination group or/and edit the allowed routes, hover over a specific entry, and click Edit .
To delete a destination group with routing override rules, hover over a specific entry, and click Delete ![]() .
.
Destination group
Shows the destination group to apply the routing override rule (allowed routes in a specific order). To choose a different destination group from the destination group set, select the needed destination group in the dropdown.
Quantity connections
Shows the number of connections that can be used to route the calls to destinations from the selected destination group. This field is read-only.
Manage routes
You can specify which connections can be used to route calls to destinations from the selected destination group. You can set the desired routing order for these connections, so the calls will be routed according to this sequence instead of applying "normal" LCR (least cost routing).
An entry in the override rules list can be either a single connection or a percentage-based pool, where each connection has the probability to be the first route according to the assigned percentage value.
Add a route
You can add another route for a specific destination group. Hover over the specific destination group, click Edit , and click Add route.
Select the connections to add to the routing override rule:
- To add all the connections of the specific vendor, select the checkbox next to the vendor name.
- To add the specific connection – select Arrow down
 near the specific vendor entry to open the list of vendor’s connections and choose the corresponding checkboxes.
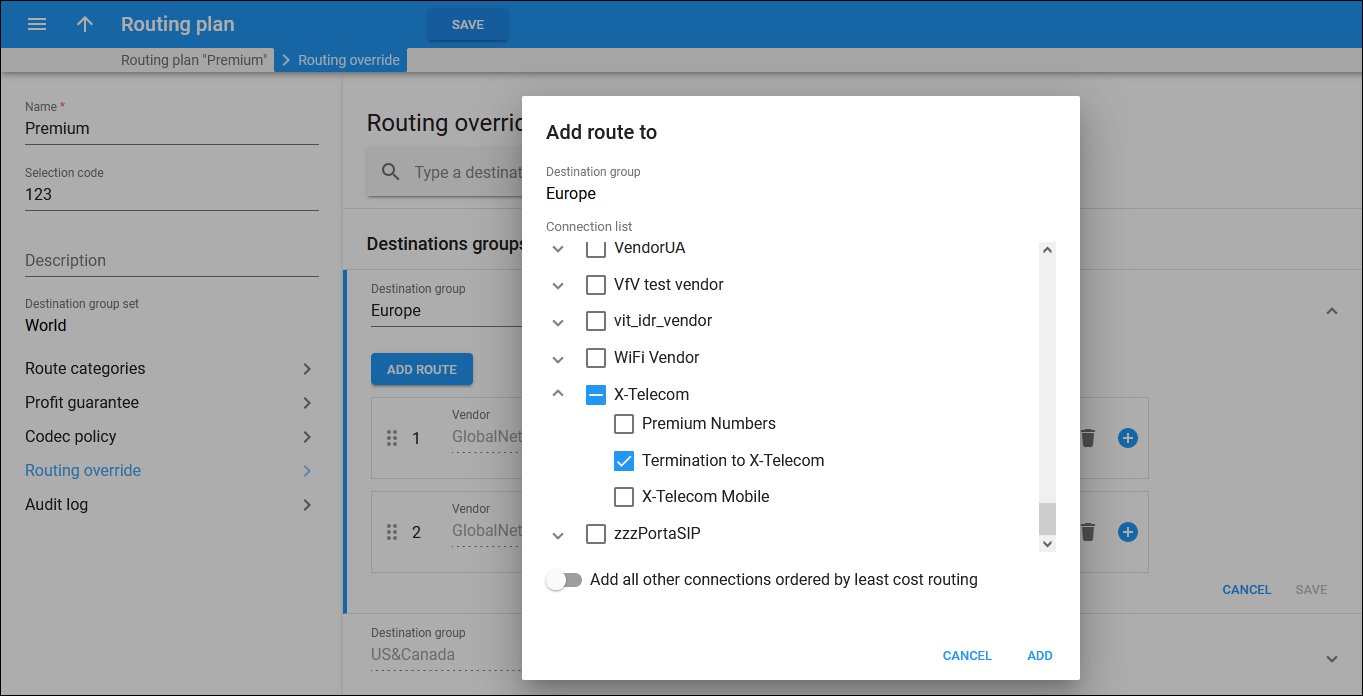
- Click Add.
Note that if you turn on the Add all other connections ordered by least cost routing toggle when creating a routing override rule, all the connections, except for the selected ones, will be displayed as a separate entry. You can drag it up or down.
Reorder routes
To reorder routes in the list, select a specific connection using Reorder and drag it up or down.
To save the changes, click Save on the toolbar.
Percentage-based pool
You can create a percentage-based pool, where each connection has a chance to be the first route proportionate to the assigned percentage value.
To create a percentage-based pool, perform the following steps:
- Hover over the specific destination group and click Edit
.
- Click Add
 next to the specific vendor connection to add more connections to the pool.
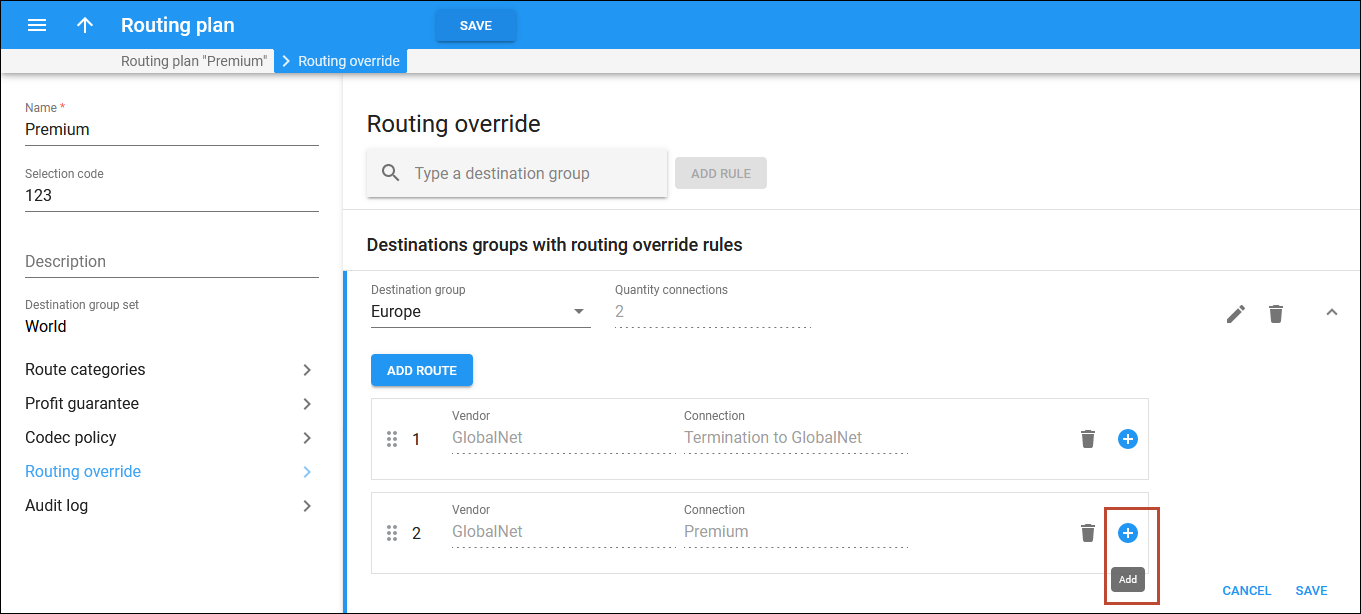
- Specify the probability of connection usage in percentage in the Probability field.
By default, when you add more than one connection to the pool, the probability of connection usage is distributed among all the connections evenly. For example, if you add two connections, the 50% probability will be automatically set for each.
If you want to set a specific probability value to one of the connections so that the value will remain unchanged when the probability is evenly distributed among other connections, specify the value and click Lock
.
Try all other connections from the pool if the first one fails
This option is enabled by default and means that the system adds all routes from the pool ordered according to their probability in the route list.
When this option is disabled, the system picks a single route with the highest probability, and other routes from the pool are ignored. To disable this option, clear the corresponding checkbox.


