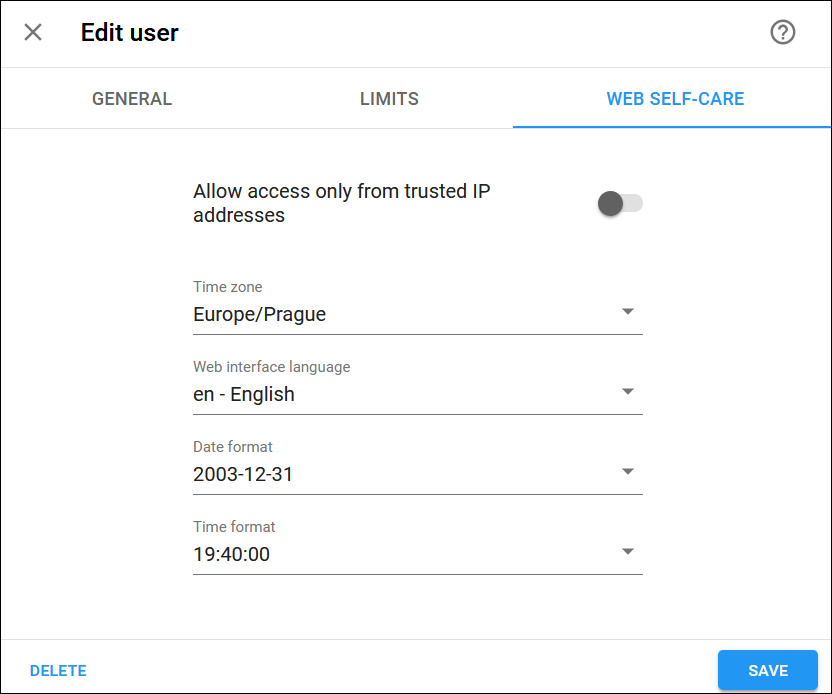
On this panel, you can edit the user record. You can switch between General, Limits, and Web self-care tabs.
To save the changes, click Save. To delete the user record, click Delete.
Login
The login used by the employee to access your portal.
Password
The employee’s password. You can change it manually or click Generate  to regenerate a random, hard-to-guess password.
To show or hide the passwords, click Show password or Hide password
.
Two-factor authentication (2FA)
You can enable 2FA for the employee to log in to your portal only after entering a one-time password (OTP) in addition to the login and regular password. The OTP is generated by a 2FA application installed on the employee’s smartphone, e.g., Google Authenticator.
You can select one of the following options in the dropdown list:
- Select As defined by the customer class to use settings defined for the customer class.
- Select Yes to enable 2FA.
- Select No to disable 2FA.
If the employee loses access to the 2FA application, click the Reset 2FA key.
Role
You can change the employee’s role that defines their permissions. Note that roles with required permissions must be preconfigured by your service provider.
You can change the email address of the employee.
Activation date
You can specify/change the employee’s record activation date, for example, for cases when the employee can access the portal only after their probation period in the company ends.
Click Calendar  to select the date or type it in the format YYYY-MM-DD. By default, the user record is activated upon creation.
Expiration date
You can specify/change the date when this user record becomes inactive, so the employee won’t be able to access the system. Click Calendar  to select the date or type it in the format YYYY-MM-DD.
Mask personal information in data accessed by this user
Turn on the toggle to restrict the employee’s access to customers’ personal data (such as name, address, contact details, etc.) if they are not allowed to either view or process it according to GDPR. Such employees will see that the personal data is masked on the web UI.
Daily credit/refund limit
You can set/change a daily limit on the total of transactions (such as manual credits, promotional credits, and refunds) that an employee can make. The credit/refund limit is reset at midnight. By default, your time zone is used for an employee, but you can set a specific time zone in the dedicated field.
Note that by default, this value is zero, which means that the employee can’t make any credit/refund transactions.
Transaction credit/refund limit
You can specify/change the amount the employee cannot exceed per transaction, such as manual credit, promotional credit, or refund. Note that the transaction limit should not exceed the daily credit/refund limit.
Allowed to increase the credit limit temporarily
You can authorize the employee to temporarily increase customers' credit limits.
To do this, turn on the Allow to increase the credit limit temporarily toggle and specify:
- The maximum amount of increase in the temporary credit limit (either as an absolute value or as a percentage of the permanent credit limit).
- The maximum period during which a customer can use the temporarily increased credit limit.
Allow access only from trusted IP addresses
By default, access to your portal is allowed from any IP address. However, you can allow the employee access only from the IP addresses that you specify here. Click Add  to add more than one IP address.
Time zone
You can change the employee’s time zone. It is used when the activation/expiration date is set for their credentials, as well as resetting the daily credit/refund limit.
Web interface language
You can change the language to be used by the employee on the portal.
Date format
You can change the format for the shown date.
Time format
You can change the format for the shown time.


