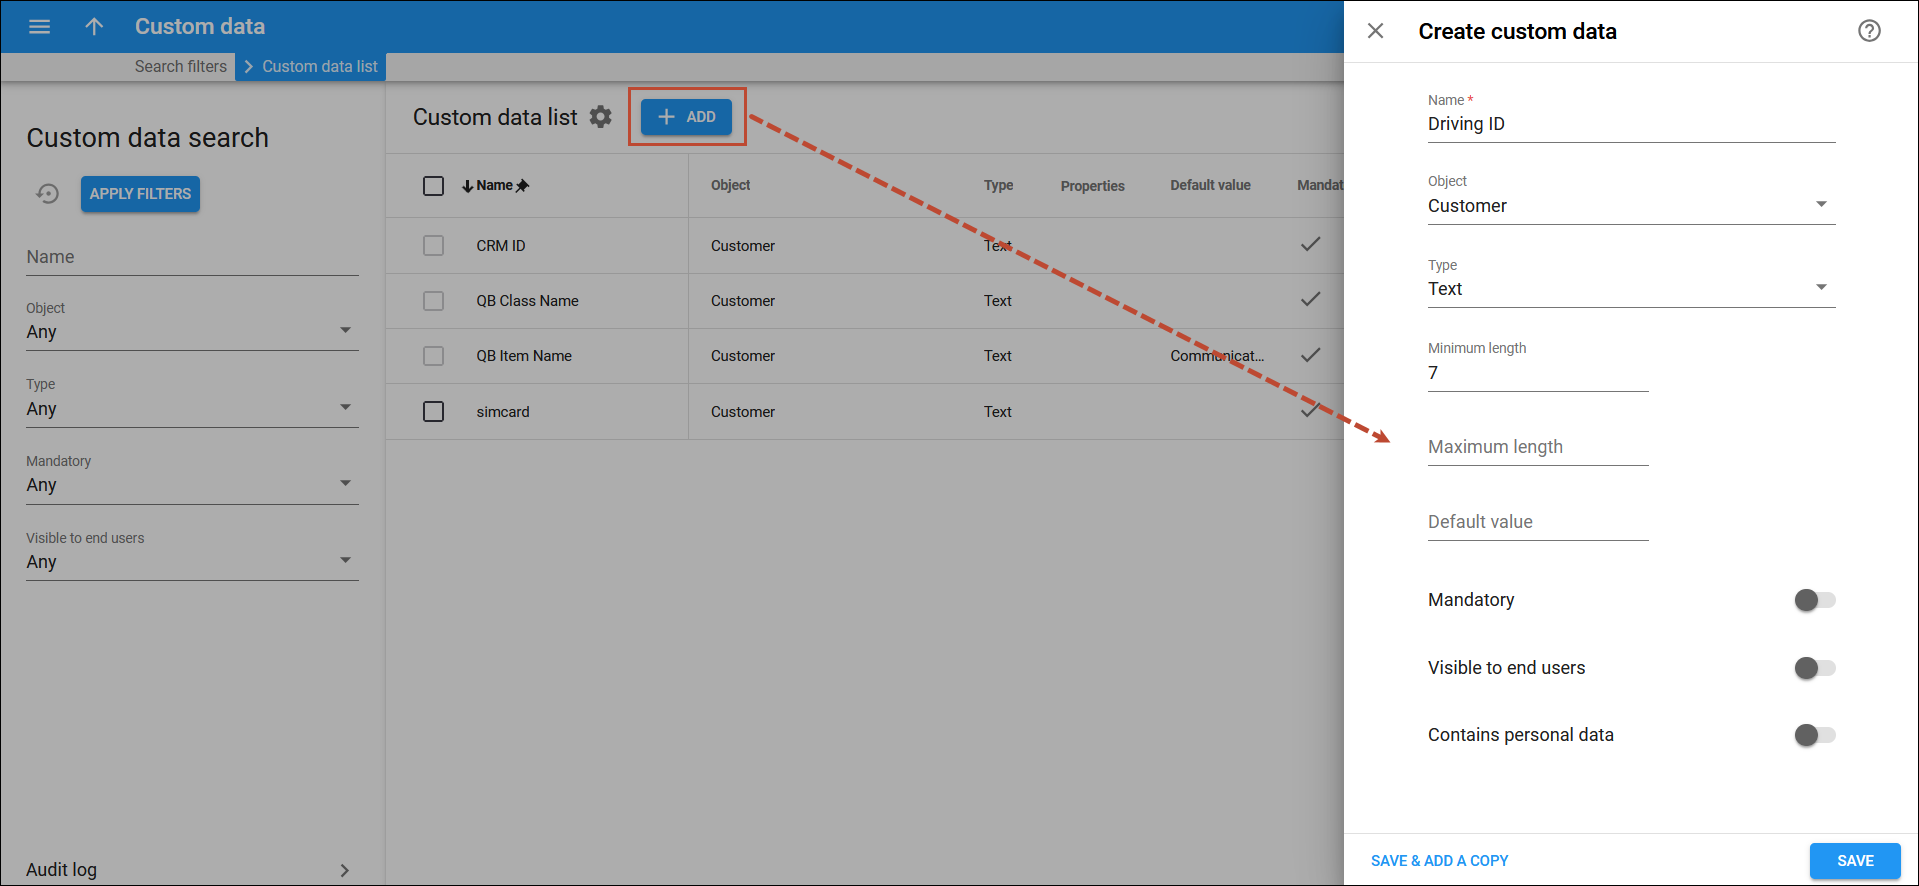
Here you can create fields for storing custom data (e.g., extra user information such as driving license ID, a code name that maps an Internet customer to a certain vendor, etc.). Custom data fields are then assigned to customer or account entities via a customer class.
To add a new custom data field, click Add on the Custom data list panel and fill in the details. To save the custom data field, click Save. To save and continue editing the custom data details, click Save & Edit details. To create more custom data fields, click Save & Add a copy.
Name
Type in a descriptive name for the custom field (e.g., Driving license ID). This field then appears on the Customer/Account panel.
Object
Select whether the custom field applies to a customer or an account.
Type
Select the format of the data that is stored in this field. Note that once a custom field is created, you can’t change its type:
- Text – select this type for a simple text (e.g., a description). By default, this field appears empty and can contain up to 255 symbols. Change the default settings here:
- Minimum length – type the minimum number of symbols (e.g., 5).
- Maximum length – type the maximum number of symbols (e.g., 20).
- Default value – type the text to be shown in this field when a customer or an account is created (e.g., Prospect).
- Number – select this type for numbers (e.g., 10). By default, this field appears empty and can contain numbers from 0 up to a quadrillion. Change the default settings here:
- Minimum value – type in the smallest possible number. The system then does not allow any number that is less than this minimum value to be entered. If you type 5, for example, entering numbers from 0 to 4 is forbidden.
- Maximum value – type in the greatest possible number. (e.g., 100). This restricts greater numbers such as 105, 202, etc. from being entered.
- Decimal place – the number of digits to the right of the decimal point (e.g., 5.25 has 2 decimal places).
- Monetary – tick the checkbox to the right if you wish to add currency values here.
- Default value – type the number to be shown in this field when a customer or an account is created (e.g., 50).
- Date – select this type for dates. By default, this field appears empty and can contain any date. Change the default settings here :
- Date from – click the icon to the left and select the start date.
- Date to – click the icon to the left and select the end date.
- Default value – click the icon to the left and select the date to be shown in this field when a customer or an account is created (e.g., 2018-09-27 depending on the date format in your system.)
- Date & time – select this type for dates with a time component. By default, this field appears empty and can contain any date and time. Change the default settings here:
- Date from – click the icon to the left and select the start date and time.
- Date to – click the icon to the left and select the end date and time.
- Default value – click the icon to the left and select the date and time to be shown in this field when a customer or an account is created (e.g., 2018-09-27 13:00:00 depending on the date and time format in your system.)
- List – select this type for a configurable list of fields. Type in the name for the field and specify its value.
- Name – type in the descriptive name that you see and select on a customer/account panel (e.g., 25 min).
- Value – type the value that the system uses when a field is selected. Note that this value is not displayed on a customer/account panel.
- Default value – this field becomes active once you have added at least one field. The selected field here is suggested when a customer or an account is created
Mandatory
By default, custom fields are not mandatory, and therefore they are displayed on customer/account Custom field panels.
Enable this toggle switch to add additional information when users sign up for your services. This field then appears during a customer/account creation. It is further displayed on a Customer/Account main panel.
Visible to end users
Some custom fields store information that is needed for support and troubleshooting and must not be shown to end users. However, information such as driving license ID, etc. can be useful for both an administrator and an end user.
Enable this toggle switch to allow end users to see and edit this custom field on their self-care interfaces.
Contains personal data
Enable this option to anonymize your user’s personal data (e.g., driver’s license or insurance ID) for your staff members who, according to GDPR, are not allowed to access it.


