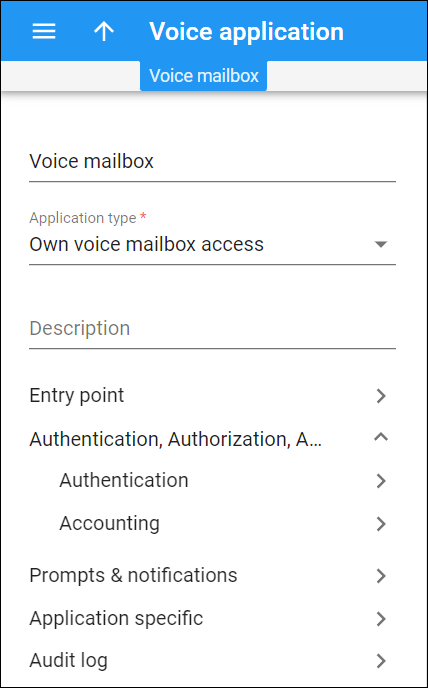
On this panel, you can change voice application settings. To save your changes, click Save.
Name
You can edit the voice application name.
Application type
The type of application used to process calls.
Description
You can add/edit a short description of the voice application.
Entry point
Open this section to manage numbers that end users dial to access the voice application.
Authentication, Authorization, Accounting
This section leads you to a group of panels that allow you to configure authentication, authorization, accounting, and specify translation rules.
Prompts & notifications
This section leads you to a group of panels where you can configure announcements/notifications that users will hear, customize prompts, and select prompt languages.
Application specific
Open this section to manage application-specific options.
Audit log
Open this section to trace changes made to the voice application.
Clone the voice application
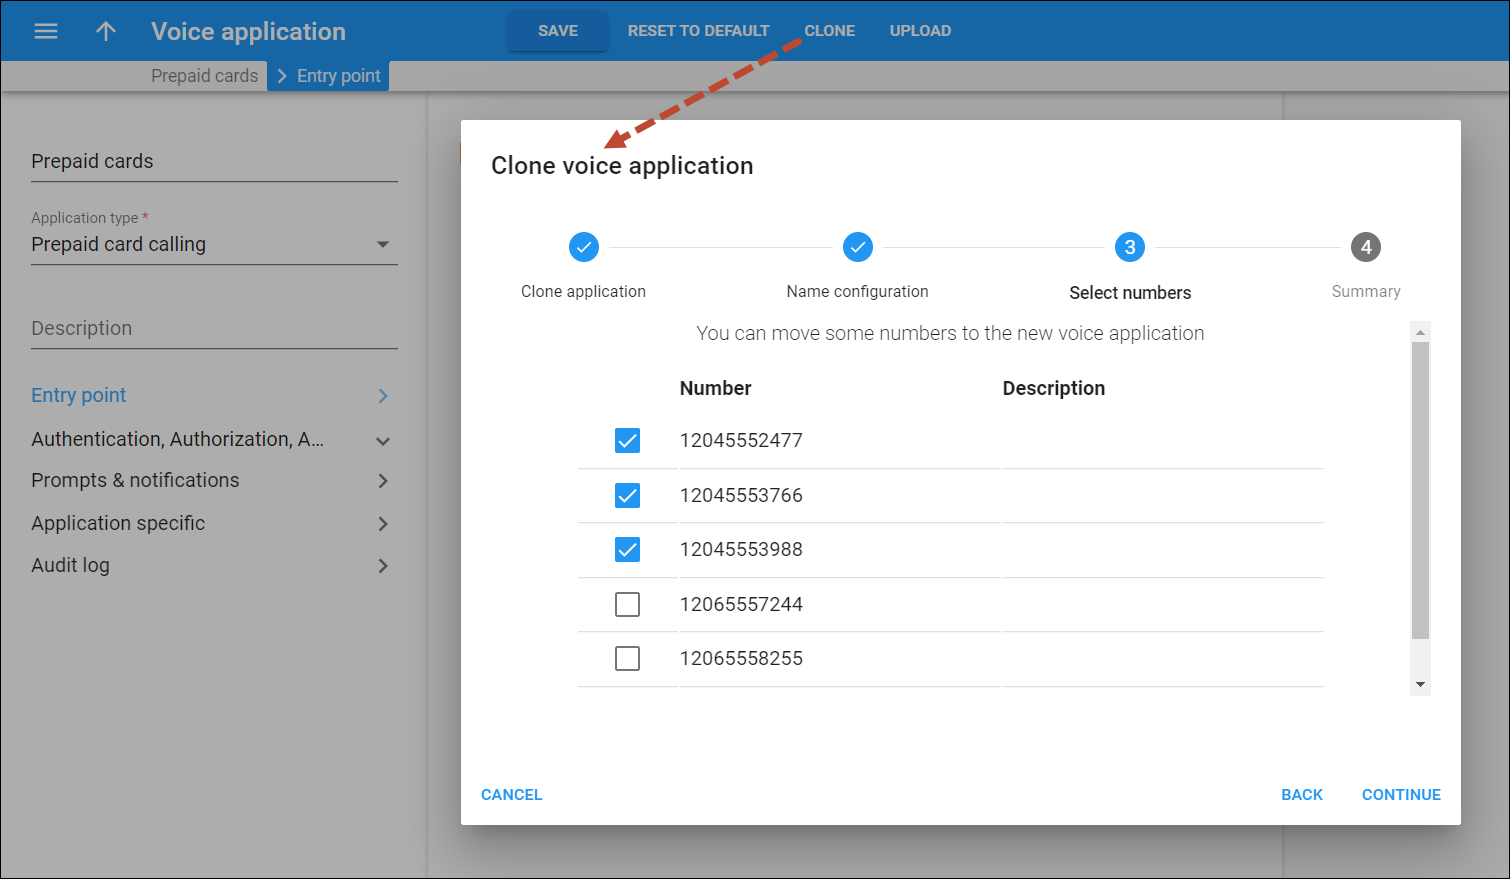
You can create a new voice application by cloning the current one:
- Click Clone on the toolbar. The dialog box opens.
- Click Continue. Since you’re cloning a specific application, the fields Clone voice application and Application type are read-only.
- Specify the new voice application name and the description (optionally). Click Continue.
- Optionally, select checkboxes for numbers that you want to move from the original application to the new one. This step is skipped if there are no numbers specified for the original application. Click Continue.
- Click Finish to confirm.
The cloned voice application inherits the parameters of the original application and can be customized later.
Reset application settings to default
To reset the application settings to default, click Reset to default on the toolbar.
Quickly upload numbers
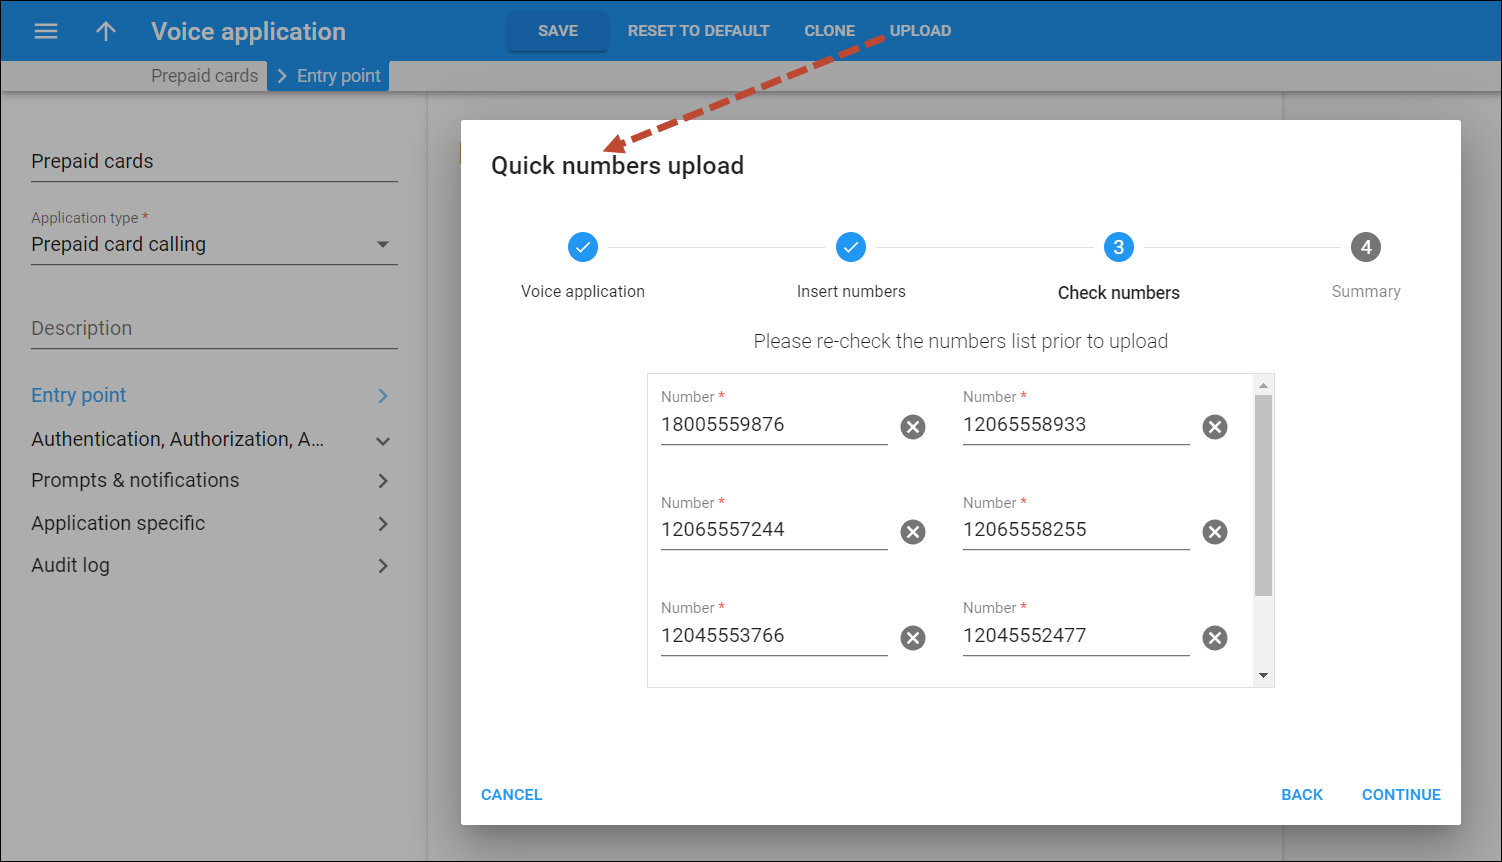
If you provide service with multiple numbers (e.g., prepaid card calling with toll-free number and local numbers in every state), type in or paste the list of numbers with Quick numbers upload:
- Click Upload on the toolbar. The dialog box opens.
- Click Continue. Since you’re uploading numbers for a specific application, the fields Upload numbers to the voice application and Application type are read-only.
- Paste the numbers list using either comma, semicolon, space, or a new line.
If you want to upload DID numbers they must be Frozen / Not in use and not assigned to any customer.
- Re-check the number list and click Continue.
You can change numbers manually and remove a number by clicking Remove
.
- Click Finish to confirm.
To see the list of numbers that users will dial to access the voice application, open the Entry point panel.


