With customer classes you can define a set of parameters to be shared among a certain category of customers. For example, you can create two separate classes – one for your retail customers and the other for your business customers, plus define the relevant parameters for each class. After that, you only need to assign the required customer class to all the customers of a given category to ensure that all of them have the same parameters (such as grace period, invoice template, taxation, notification list, etc.)
There is a Default customer class in PortaBilling with default settings. You cannot delete it.
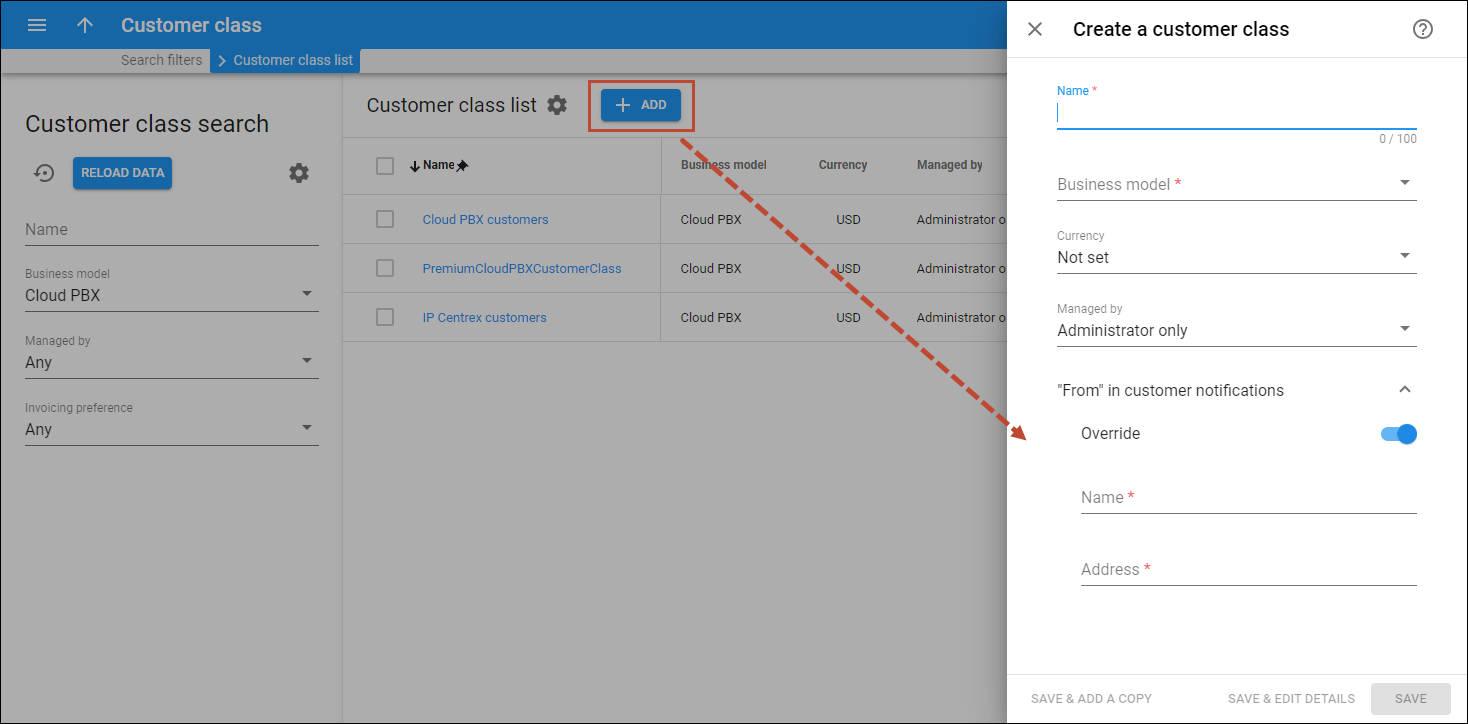
To add a new customer class, click Add on the Customer class list panel and fill in the details. To save the customer class, click Save. To save and continue editing the customer class details, click Save & Edit details. To create more customer classes, click Save & Add a copy.
Name
Type a unique name for the customer class.
Business model
Use a business model to categorize customers by the type of service to be provided to them (for example, Cloud PBX, Internet access, etc.).
Currency
Specify in which currency you charge the customers of this customer class. Note that you can define the currency only when you create the customer class and can’t change it later. Also you can assign this customer class to customers that are charged in the same currency.
If you intend to include customers with different currencies into this customer class, you may leave this field empty. However, fraud protection configuration is disabled for such customer classes since a defined currency is required to monitor a customer’s daily expenses.
Managed by
Specify the owner of this customer class:
- Administrator only means that only the administrators can edit and assign this customer class.
- Reseller name means that the customer class is intended to be used by this particular reseller.
“From” in customer notifications
By default, customers in this customer class will receive notifications like “Invoice is overdue” or “Credit card expired” from the company’s email address specified in the Address information > Legal info panel (the Name and “From” address in customer notifications fields is used).
To override the email address and name for customer notifications for this customer class, turn on the Override toggle.
Name
Specify the sender’s name.
Address
Specify the “From” email address.
You can change the email address and name later in the Email configuration panel.


